How I Transformed My Bathroom Into an Elegant Spa Retreat (Without Breaking the Bank!)
Creating an elegant bathroom design changed everything about how I start and end my day.
My old bathroom was cluttered, chaotic, and honestly kind of depressing.
You know that feeling when you walk into a space and immediately feel stressed?
That was me every morning.
Then I discovered that elegance doesn’t mean expensive—it means thoughtful.
After redesigning my bathroom with a spa-like approach, I actually look forward to my morning routine now.
The best part? You don’t need a massive budget or a complete gut renovation to make it happen.
Let me walk you through exactly what I did, and trust me, if I can do this, anyone can.

💡 Steal This Look
- Paint Color: Sherwin-Williams Sea Salt SW 6204
- Furniture: floating vanity with clean lines and integrated storage
- Lighting: layered lighting with dimmable LED recessed lights and wall-mounted vanity sconces
- Materials: natural stone countertops, brushed nickel fixtures, and soft cotton bath linens
There’s something magical about transforming your daily routine into a mini retreat. When your bathroom feels like a sanctuary, those few minutes of self-care become the highlight of your day rather than just another task to rush through.
The Foundation: Getting Your Color Palette Right
I’m not gonna lie—I used to think more colors meant more personality.
Wrong!
The secret to an elegant bathroom is restraint, and I learned this the hard way after painting an accent wall teal (yikes).
Here’s what actually works:
- Stick to 2–3 colors maximum
- Warm whites and soft greys became my best friends
- One contrast tone adds drama without chaos
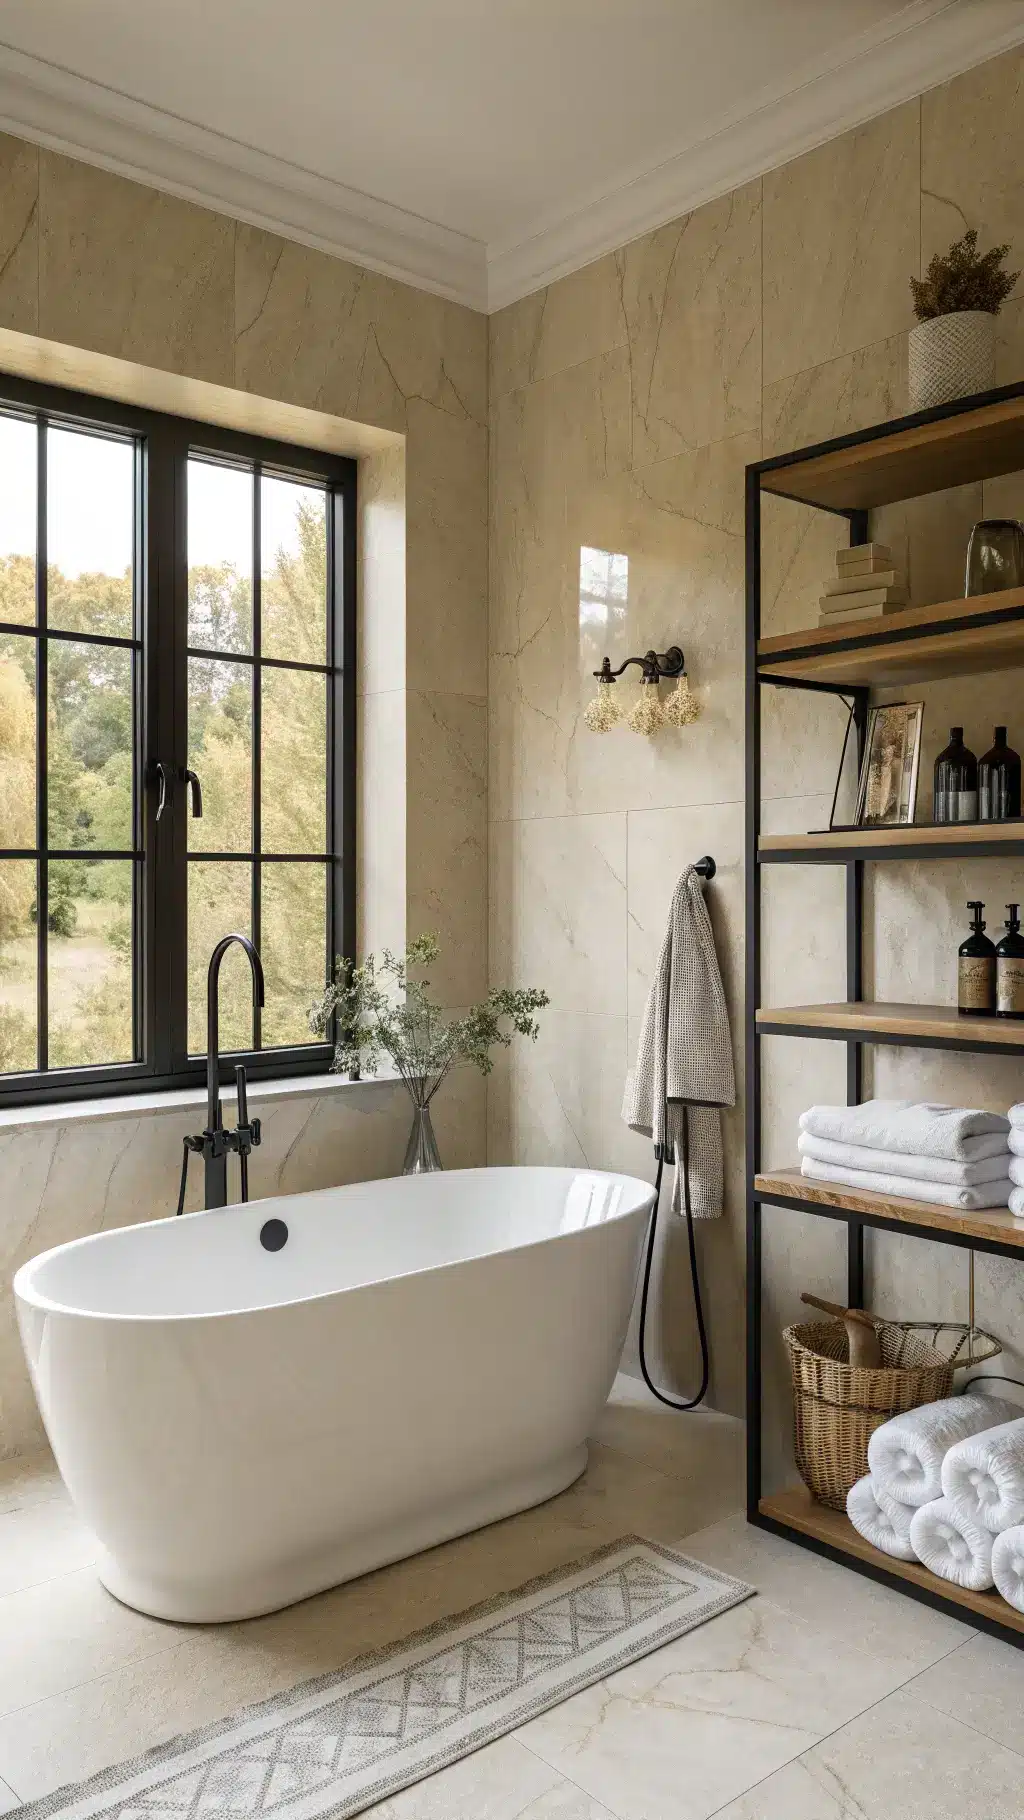
- I chose beige walls with black fixtures, and the transformation was insane
My bathroom went from looking like a Pinterest fail to something you’d see in a boutique hotel.
The materials matter too—I added wood accent shelving and suddenly the space felt timeless instead of trendy.
Natural materials like marble or stone give you that expensive look even when you’re working with a tight budget.
I found marble-look contact paper for my countertop edges, and guests literally think it’s real marble.
🏠 Steal This Look
- Paint Color: Benjamin Moore Revere Pewter HC-172 for walls with Benjamin Moore Black Beauty 2128-10 for contrast elements
- Furniture: floating vanity in warm wood finish with clean lines and integrated storage
- Lighting: matte black sconce fixtures with warm white LED bulbs flanking mirror
- Materials: natural marble countertops, warm wood accent shelving, matte black metal fixtures
I completely relate to thinking more color equals more style—we’ve all been there with that regrettable accent wall! The beauty of a restrained palette is how sophisticated it makes even a small bathroom feel.
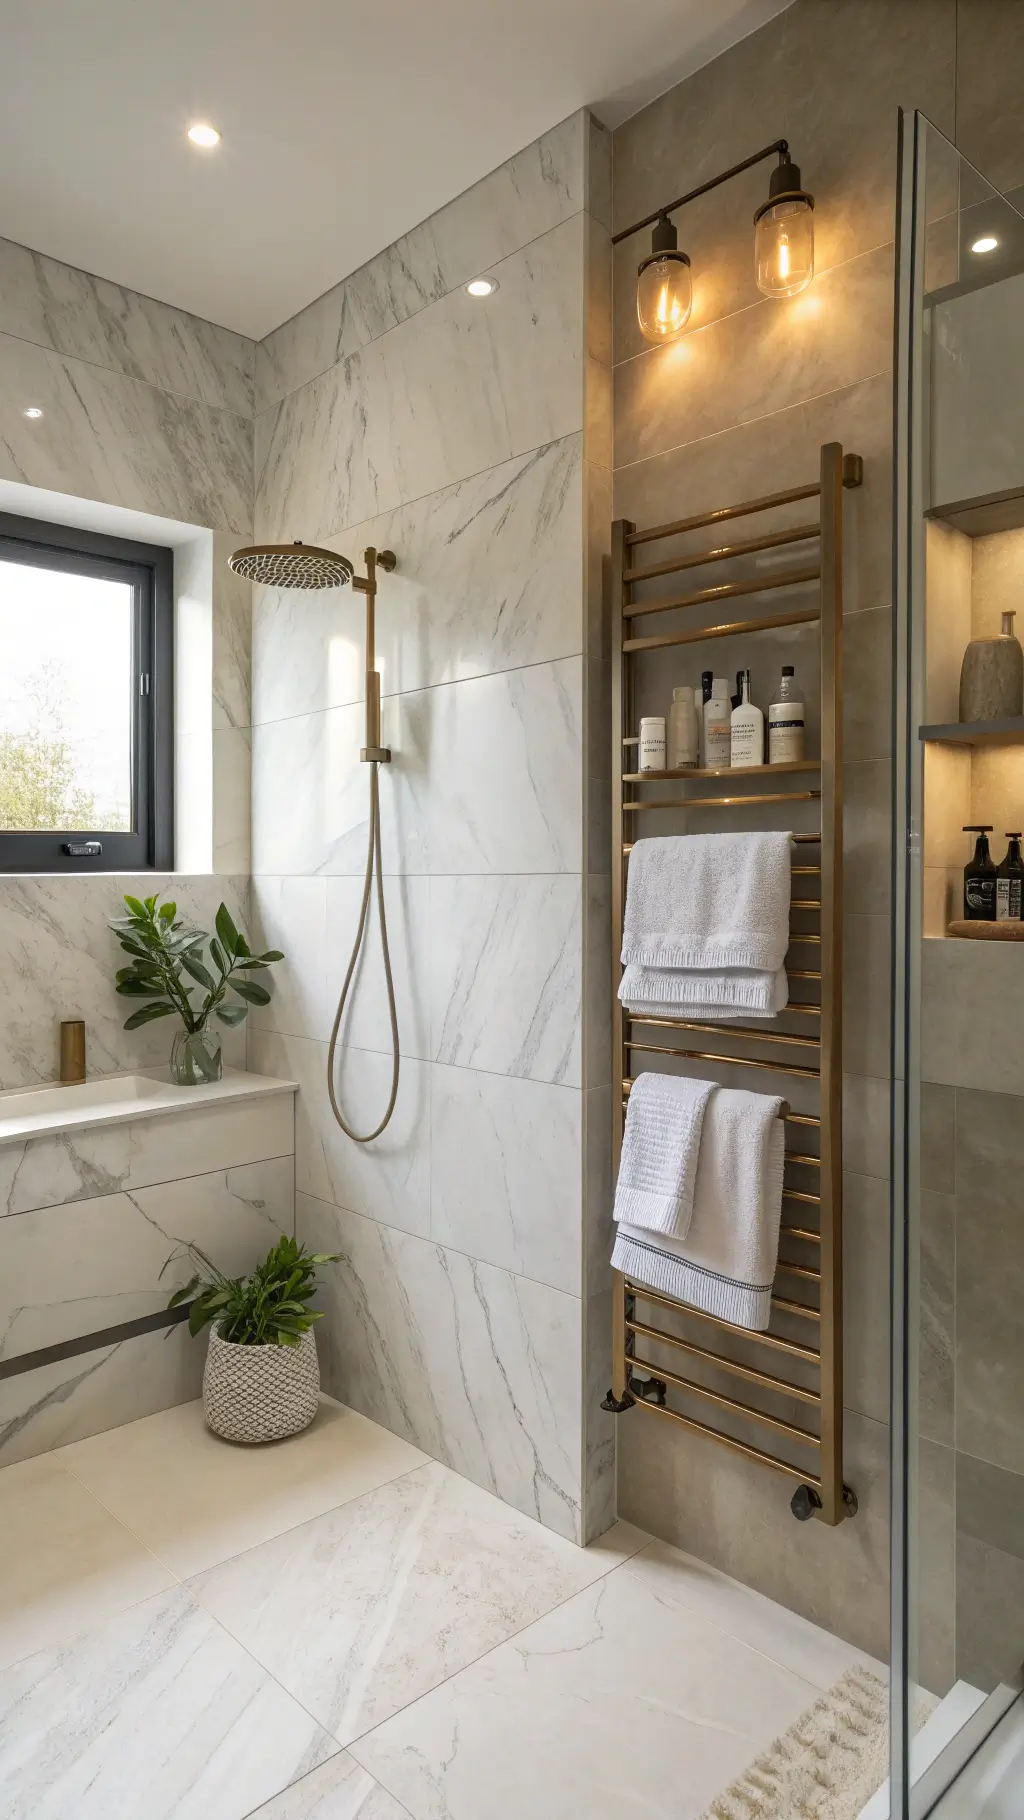
The Game-Changers: Fixtures That Make You Feel Rich
Okay, this is where I splurged a little, and I have zero regrets.
Quality fixtures are the difference between “meh” and “wow.”
My must-haves:
- Freestanding tub – I saved for six months for mine, and it’s the centerpiece of the entire room
- Sleek faucets – I went with brushed brass bathroom faucets and they’re gorgeous
- Frameless glass shower – Makes even a small bathroom feel twice as big
The faucet upgrade alone made everything look more intentional.
Before, I had those builder-grade chrome ones that screamed “rental apartment.”
Now? Pure elegance.
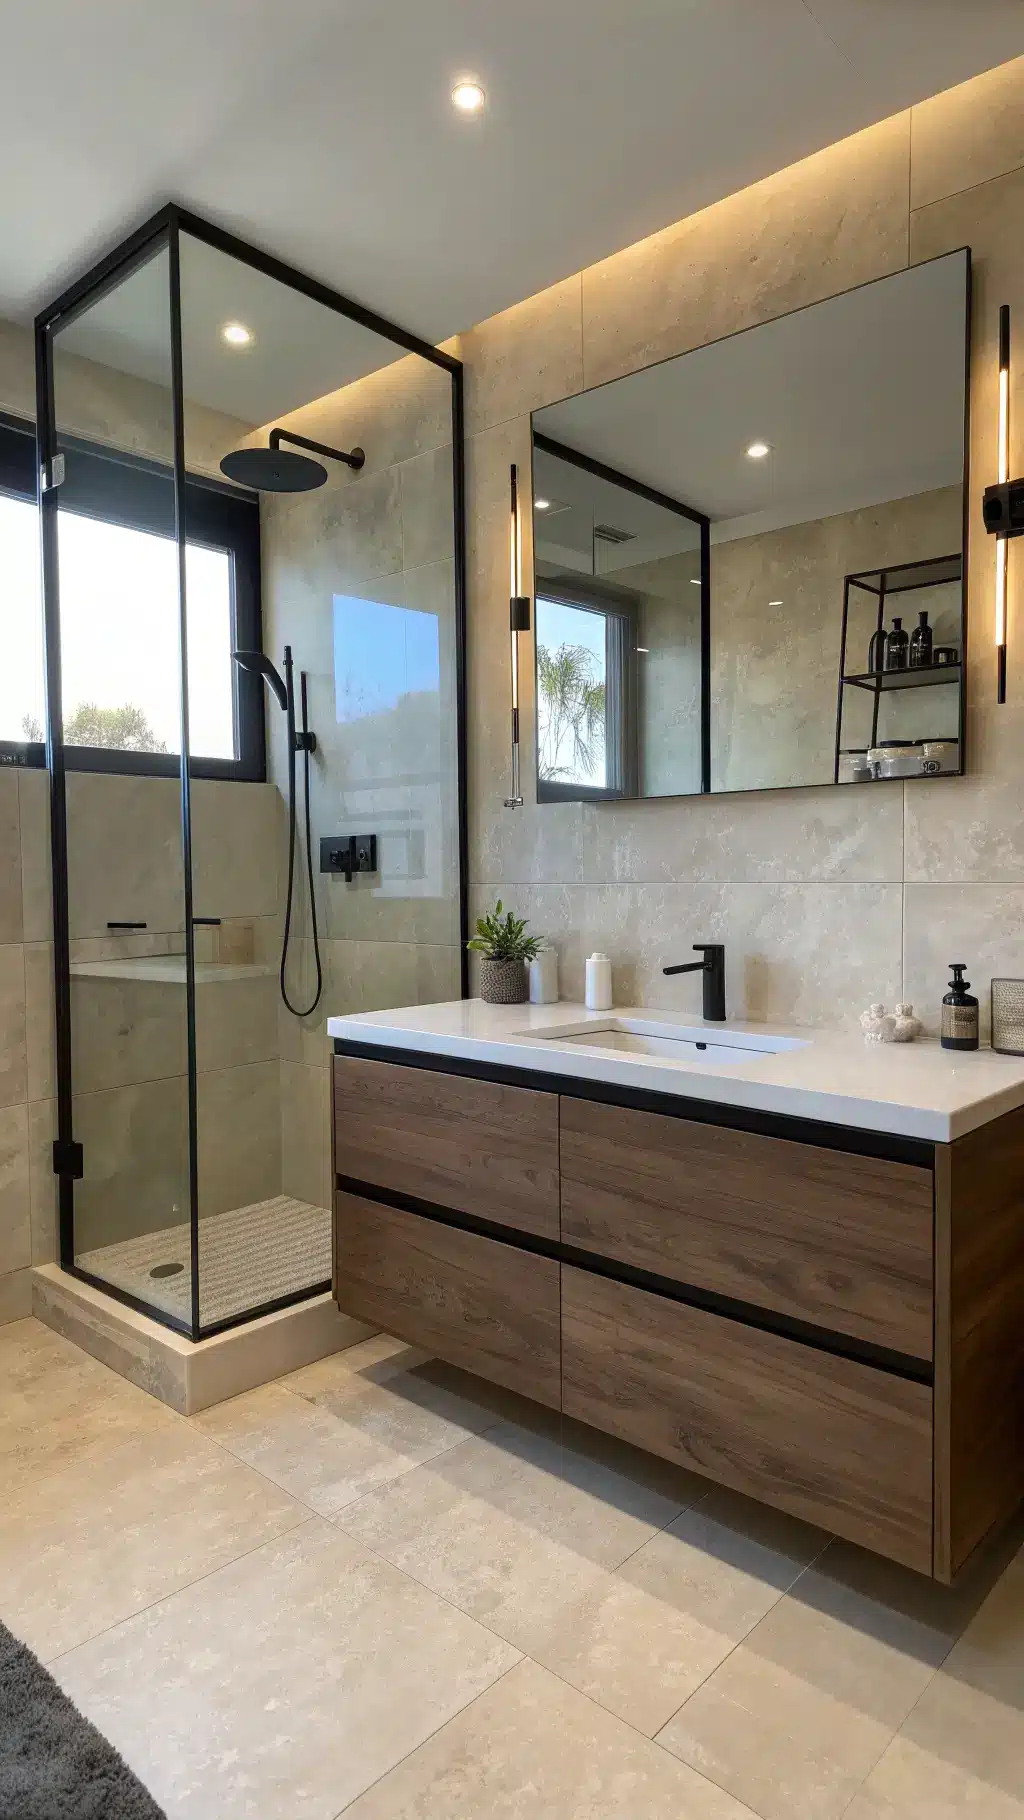
If a freestanding tub isn’t in your budget right now (I get it), focus on the faucets and rainfall showerhead first.
These give you the biggest visual impact for your money.
🏠 Steal This Look
- Paint Color: Farrow & Ball Pavilion Gray 242
- Furniture: freestanding soaking tub with clean lines, floating vanity with integrated sink, sleek storage cabinet
- Lighting: modern brass pendant lights or contemporary vanity sconces
- Materials: brushed brass fixtures, frameless glass, natural stone or quartz countertops
There’s something deeply satisfying about upgrading from builder-grade chrome to quality brass fixtures – it’s like watching your bathroom transform from apartment-basic to hotel-luxe overnight. The splurge on that freestanding tub becomes your daily retreat.
Lighting: The Secret Weapon Nobody Talks About
I cannot stress this enough—lighting changes everything!
My bathroom had one harsh overhead light that made me look like a zombie every morning.
Not cute.
Here’s what I installed:
- Soft overhead lighting with a dimmer switch
- Bathroom vanity sconces on both sides of the mirror
- Dimmable LED bulbs everywhere
Now I can have bright task lighting for makeup in the morning and soft, relaxing light for evening baths.
The dimmer was like $15 and took 20 minutes to install.
Game. Changer.
✎ Steal This Look
- Paint Color: Behr Classic Silver 790C-3 – a sophisticated neutral that enhances both warm and cool lighting temperatures
- Furniture: floating vanity with clean lines and integrated storage
- Lighting: brushed brass bathroom sconces with white glass shades flanking mirror
- Materials: polished chrome fixtures, marble countertops, ceramic subway tile
The difference between harsh overhead lighting and properly layered bathroom lighting is like night and day – literally transforming how you feel in the space every morning.
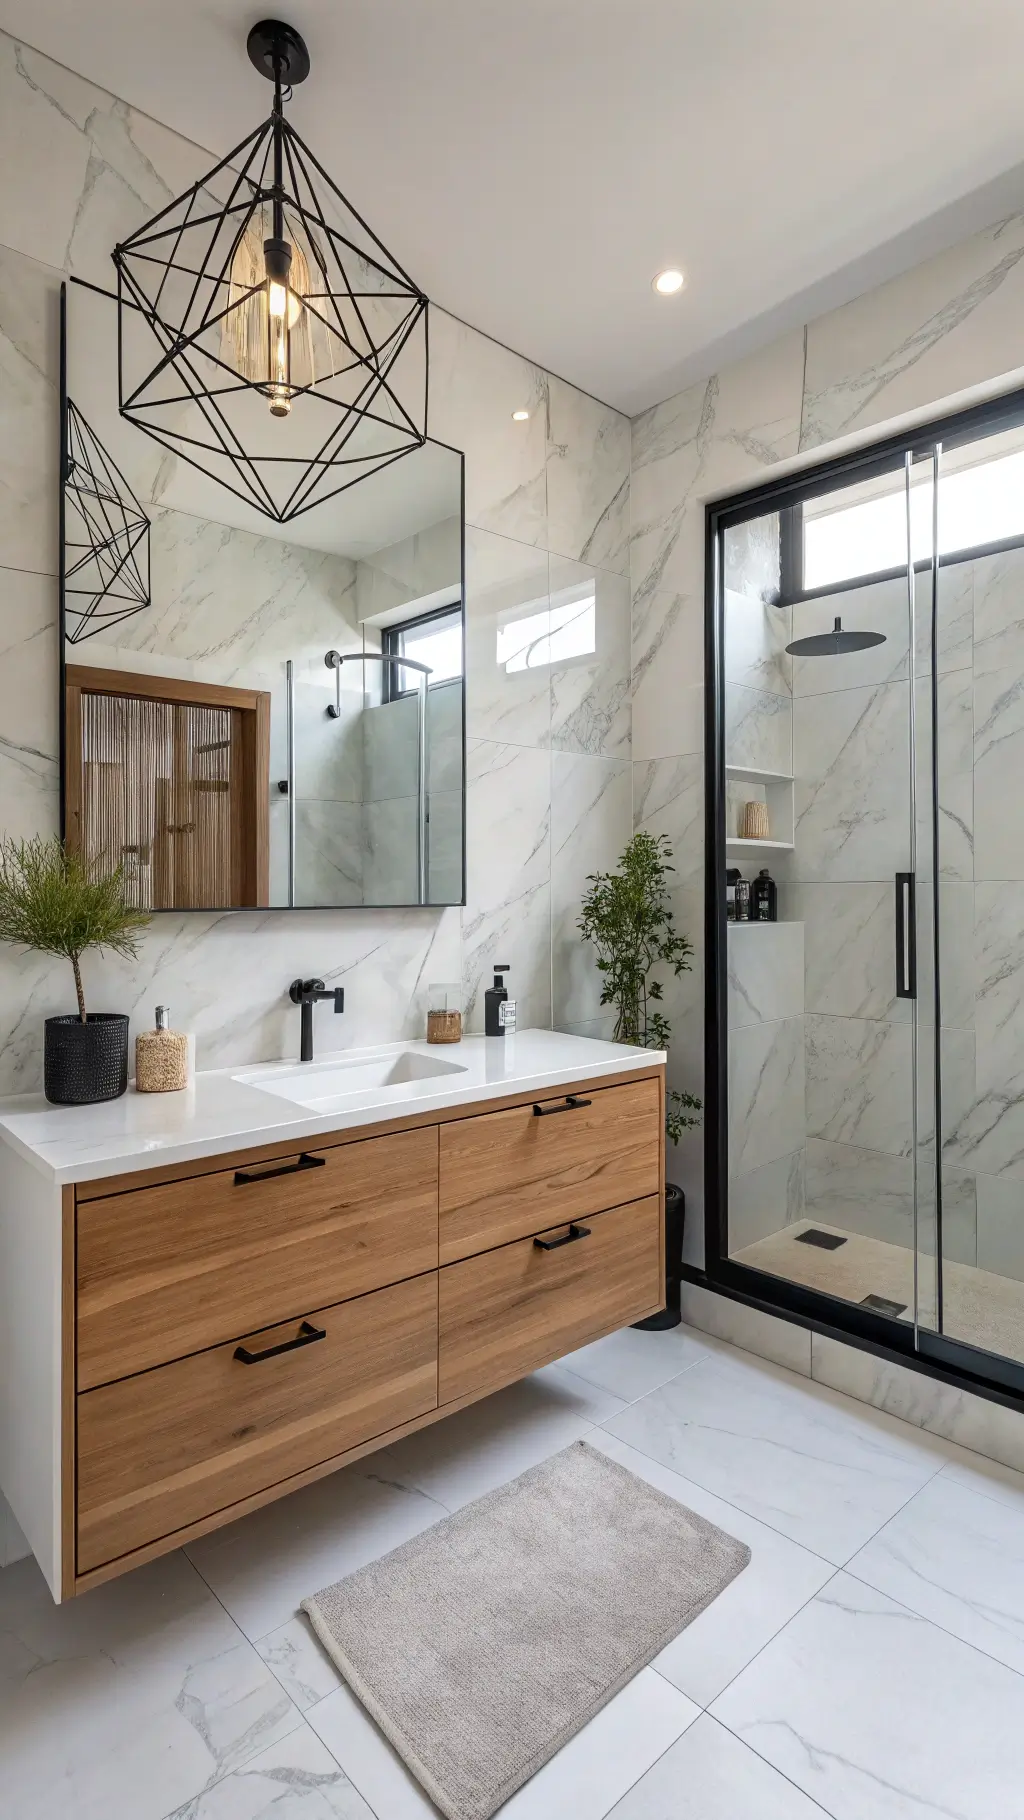
Creating That Seamless, Expensive Look
Large-format tiles were my secret weapon here.
Fewer grout lines = more elegant, period.
I used large marble-look porcelain tiles on both the floor and shower walls.
The continuity makes everything feel cohesive and high-end.
Plus, less grout means less cleaning, which is honestly the real win.
Storage solutions that keep things clutter-free:
- Vanity with deep drawers (not doors—drawers are way more practical)
- Recessed medicine cabinet instead of that bulky mirror cabinet I had before
- Built-in shower niche for products
When your countertops are clear, everything automatically looks more elegant.
I keep only decorative soap dispensers and a small plant visible.
✎ Steal This Look
- Paint Color: Valspar Polar Star 7006-1C
- Furniture: floating vanity with deep soft-close drawers in white oak or walnut finish
- Lighting: recessed LED ceiling lights with vanity sconces flanking recessed medicine cabinet
- Materials: large-format marble-look porcelain tiles, quartz countertops, brushed gold hardware
There’s something so satisfying about walking into a bathroom that feels like a high-end spa retreat. When every surface flows seamlessly together, you’ve created that expensive look without the designer price tag.
Adding Those Spa-Like Touches
This is where the magic really happens.
Comfort features turn your bathroom from functional to feel-good.
My favorite additions:
- Luxury bath towels (I bought Turkish cotton ones and they’re ridiculously soft)
- Thick memory foam bath mat
- Heated towel rack (sounds fancy but mine was under $100)
For atmosphere, I keep unscent