Why Two-Tone Cabinets Are Your Kitchen’s Best Friend
Let’s cut to the chase. Two-tone kitchen cabinets aren’t just a trend—they’re a game-changing design strategy that solves multiple kitchen challenges in one brilliant move.
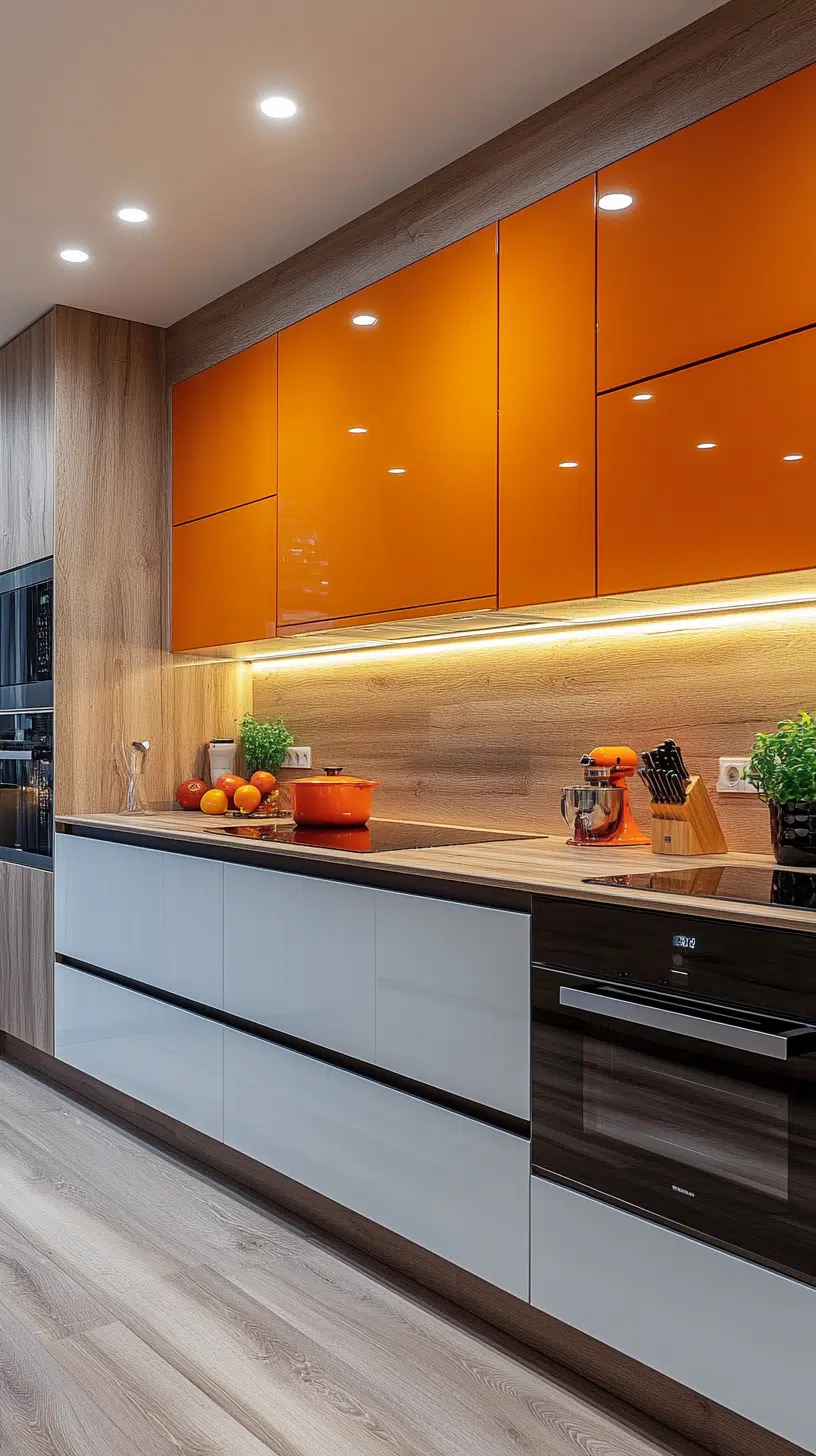
What Makes Two-Tone Cabinets Magic?
- Creates visual depth and dimension
- Makes small kitchens feel larger
- Adds personality without overwhelming the space
- Breaks design monotony
- Allows you to play with color without going crazy
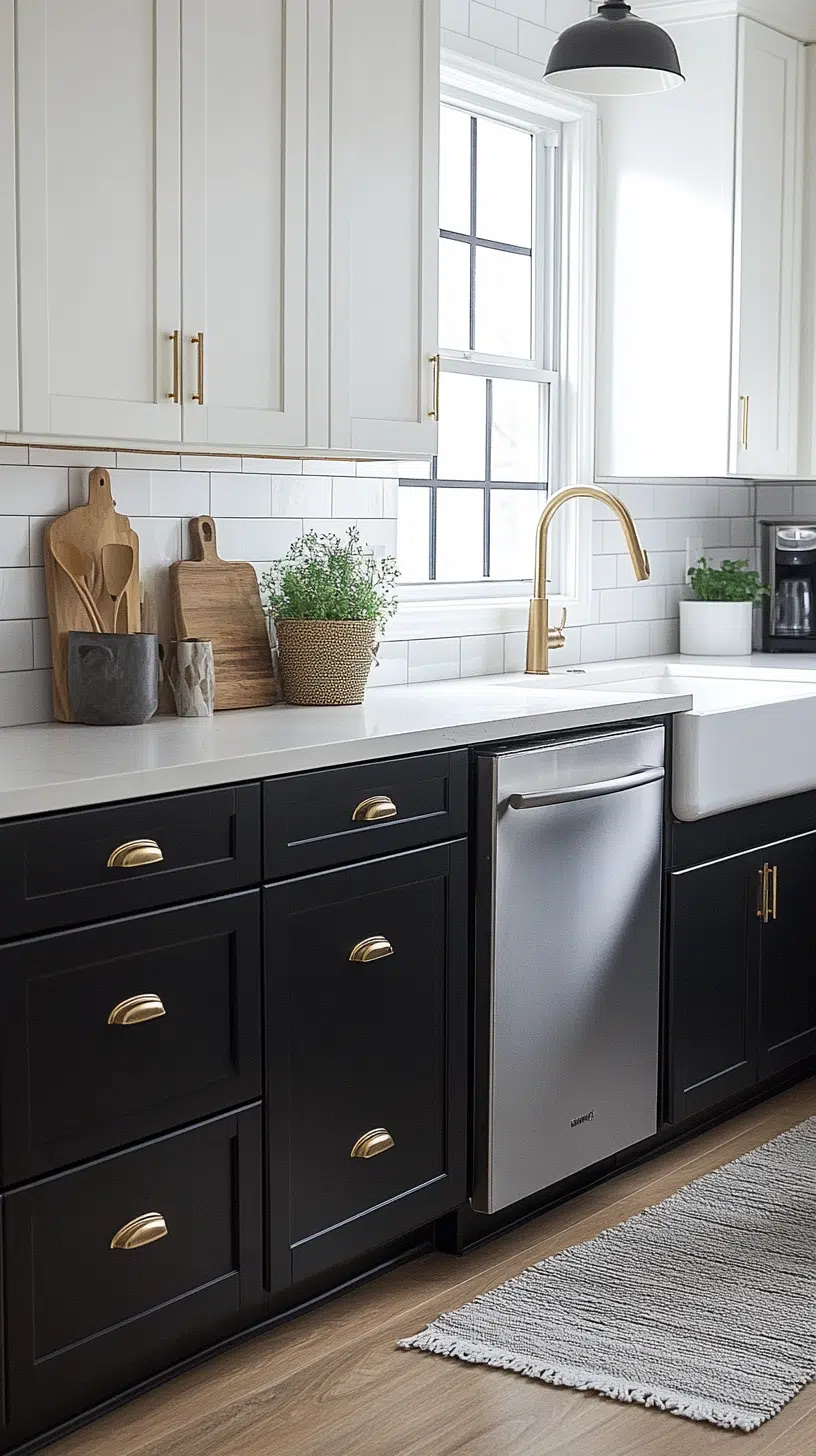
🖼 Steal This Look
- Paint Color: Sherwin-Williams Pure White SW 7005 for upper cabinets, Sherwin-Williams Urbane Bronze SW 7048 for lower cabinets
- Furniture: kitchen island with waterfall quartz countertop, open shelving in natural oak, bar stools with leather seats
- Lighting: linear LED pendant lights over island, under-cabinet LED strip lighting
- Materials: matte painted cabinetry, brushed brass hardware, white oak accents, quartz or marble-look countertops
I’ve watched hesitant homeowners transform into two-tone evangelists once they see how this approach lets them experiment with bold colors safely—the island or lower cabinets become your playground while the perimeter stays timeless.
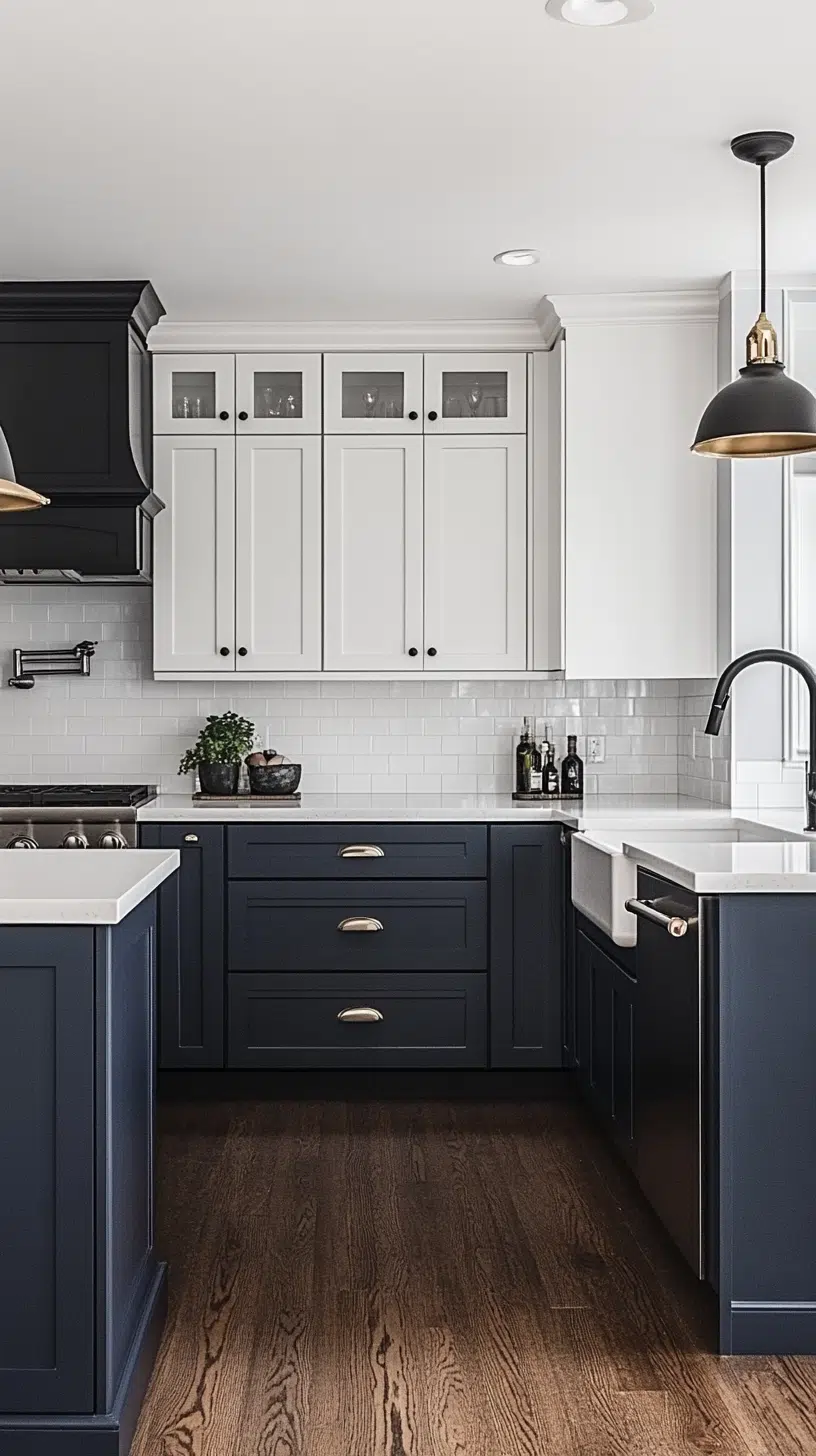
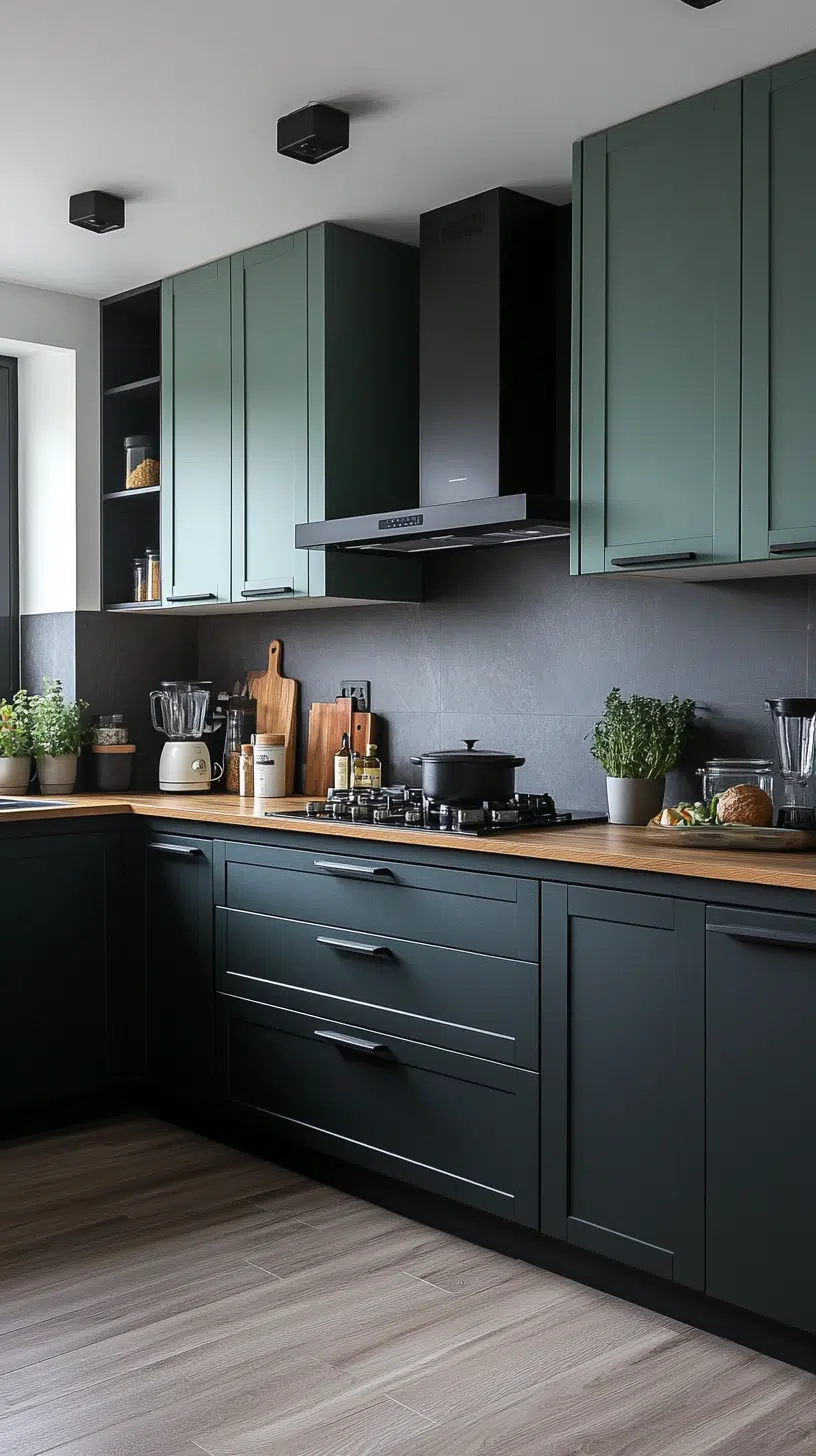
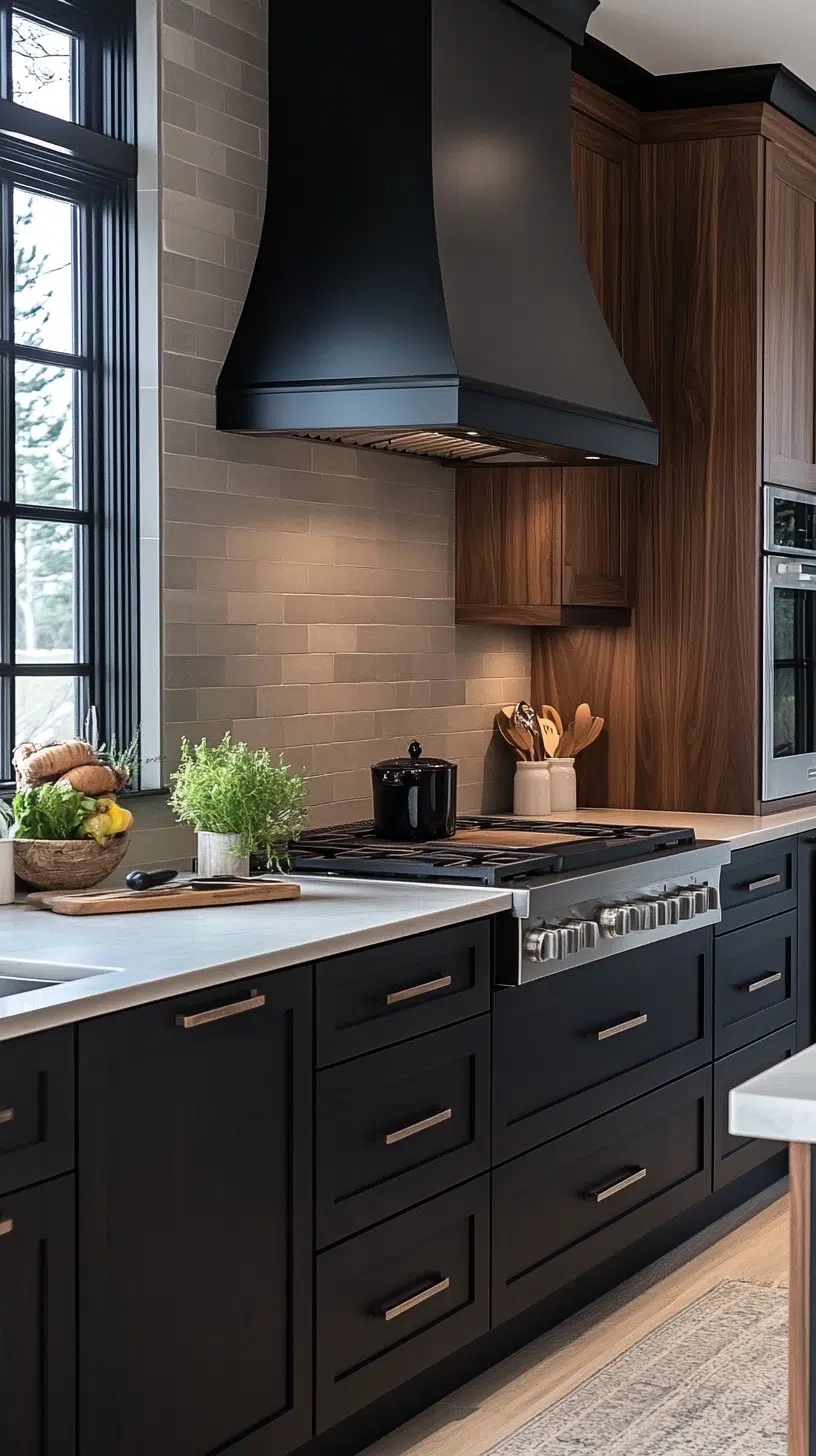
My Favorite Color Combos (That Actually Work)
- Classic Neutrals: White uppers + charcoal lowers
- Bold & Balanced: Navy blue island + cream cabinets
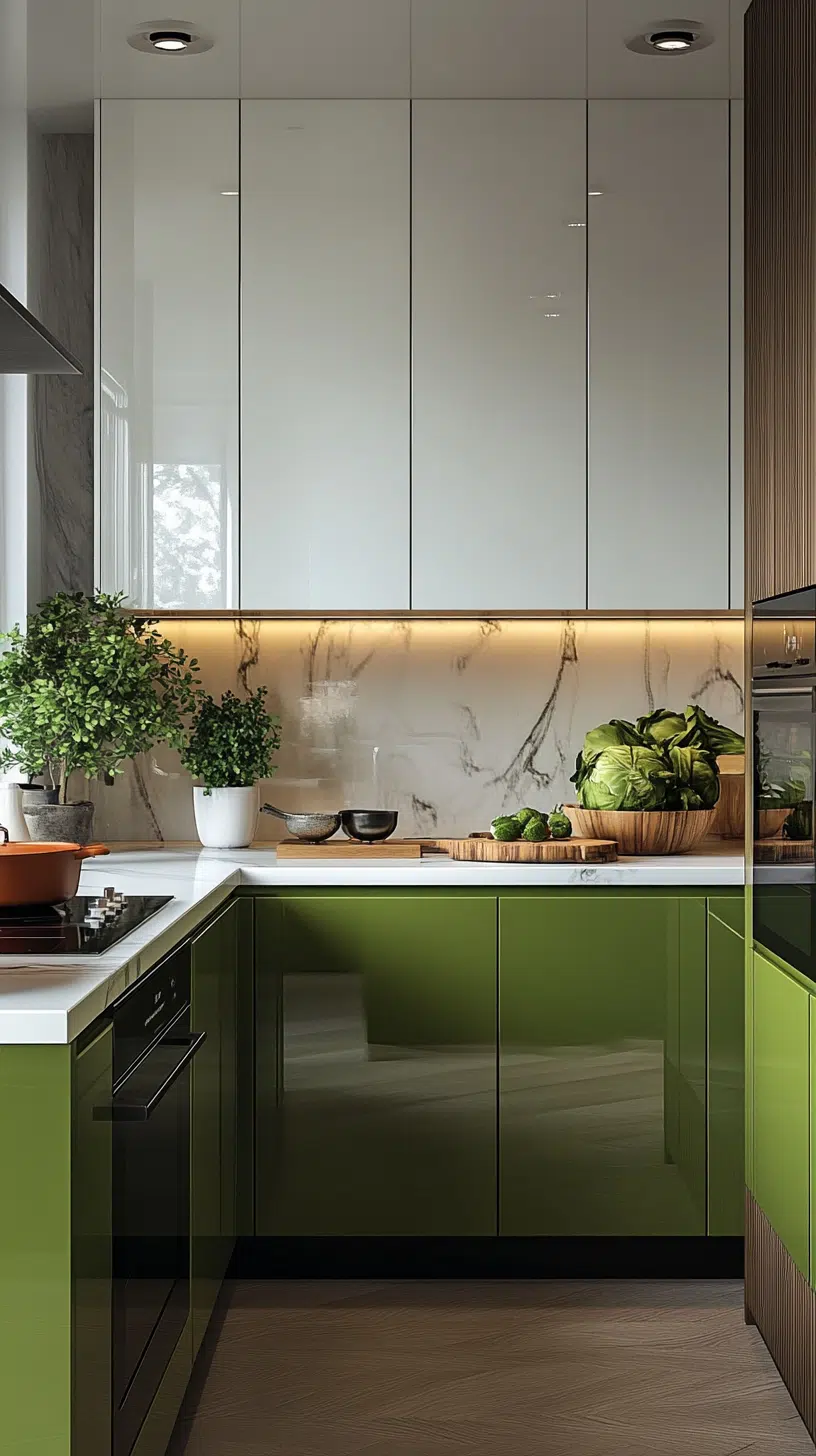
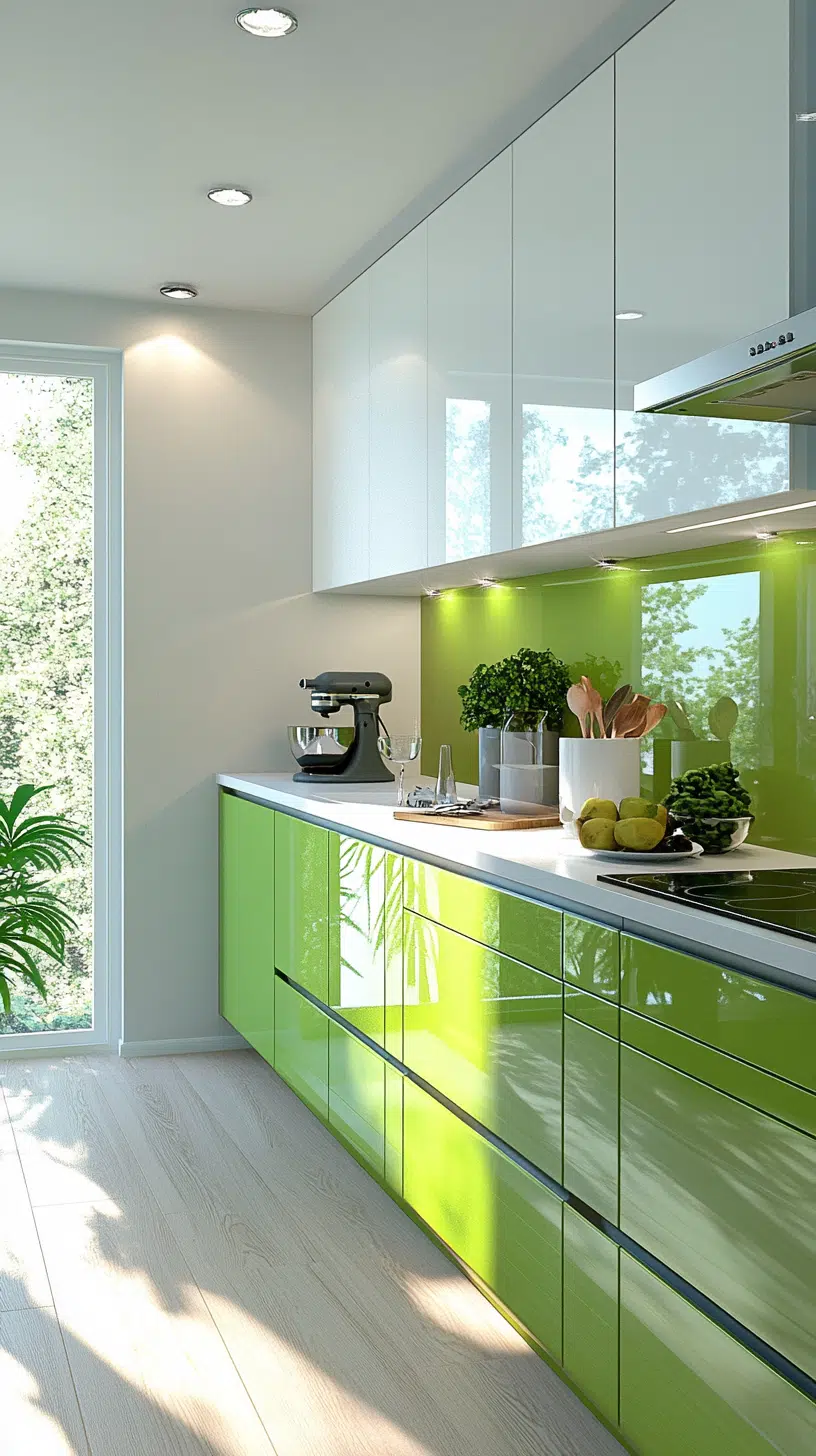
- Warm & Modern: Wood tone base + soft sage green uppers
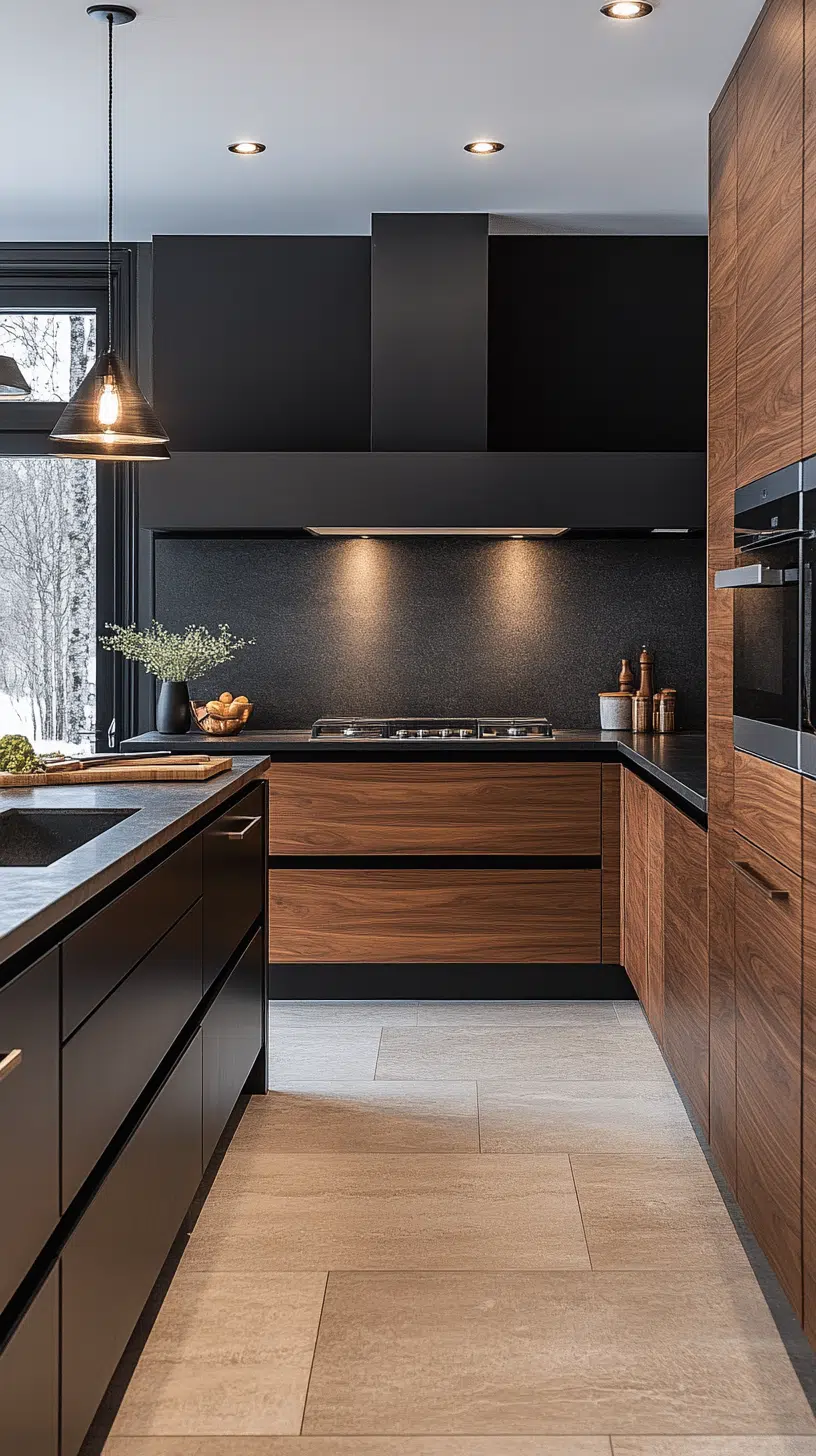
- Dramatic Contrast: Matte black lowers + warm white uppers
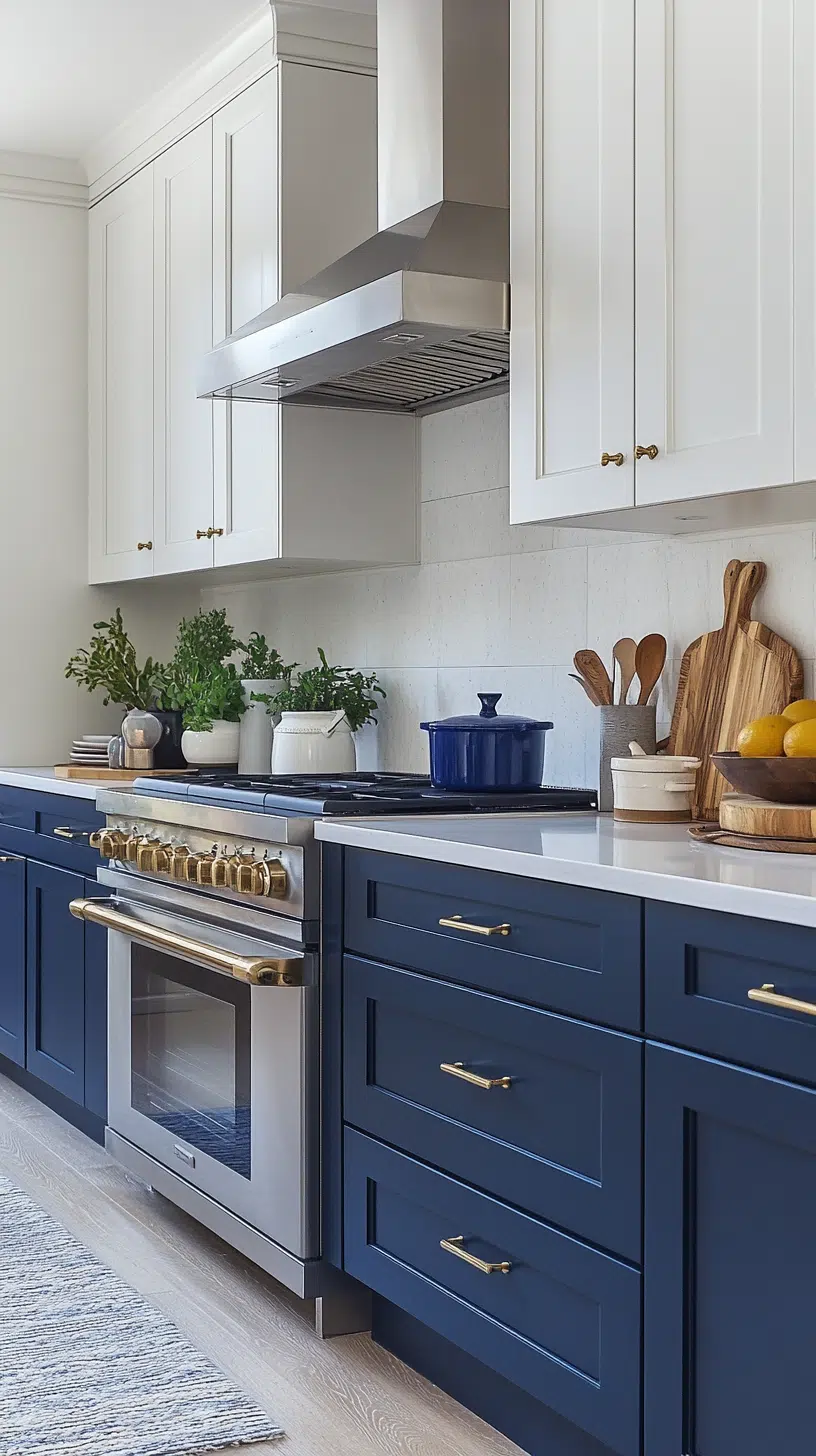
💡 Steal This Look
- Paint Color: Benjamin Moore Chantilly Lace OC-65 for crisp white uppers; Benjamin Moore Kendall Charcoal HC-166 for deep lower cabinets; Benjamin Moore Hale Navy HC-154 for statement islands; Benjamin Moore Sage Tint 458 for soft green accents
- Furniture: Brushed brass bar stools with leather seats, walnut floating shelves, matte black pendant lights over island, natural oak dining table with bench seating
- Lighting: Schoolhouse glass pendants in aged brass, under-cabinet LED strip lighting, oversized dome pendant over kitchen sink
- Materials: Honed Carrara marble countertops, white oak open shelving, matte ceramic subway tile backsplash, unlacquered brass cabinet hardware, textured linen cafe curtains
I’ve lived with white-upper-charcoal-lower kitchens in two homes now, and the combo somehow feels both editorial and livable—like your kitchen got dressed up but still knows how to handle a red wine spill at midnight.
Planning Your Two-Tone Kitchen Adventure
Budget Breakdown
- DIY Paint Route: $200-$500
- Professional Refinish: $1,000-$3,000
- Full Cabinet Replacement: $5,000-$15,000
Pro Styling Secrets
Upper Cabinets Strategy:
- Use lighter colors to create height
- Reflect more light
- Make the space feel more open
Lower Cabinet Approach:
- Ground the design with deeper tones
- Hide potential wear and tear
- Create a strong visual anchor
💡 Steal This Look
- Paint Color: Farrow & Ball Wimborne White No. 239 for upper cabinets; Farrow & Ball Railings No. 31 for lower cabinets
- Furniture: shaker-style cabinet boxes with simple recessed panel doors, brushed brass bar pulls, and a white quartz waterfall island countertop
- Lighting: three oversized clear glass globe pendant lights with blackened brass hardware suspended over the island
- Materials: matte painted wood cabinetry, honed Carrara marble backsplash, natural white oak flooring, and aged brass hardware
I’ve walked too many homeowners through the regret of going too dark on top—there’s something genuinely uplifting about reaching for a mug in a light, airy upper cabinet while the grounded lower cabinets quietly handle the daily scuffs and splashes.
Execution: Making It Happen
Essential Tools
- High-quality paint
- Professional-grade brushes
- Primer
- Sandpaper
- Painter’s tape
- Patience (seriously, don’t rush this)
Step-by-Step Implementation
- Thoroughly clean existing cabinets
- Sand surfaces for better paint adhesion
- Apply primer
- Paint with smooth, even strokes
- Allow proper drying time between coats
🌟 Steal This Look
- Paint Color: Behr Premium Plus Ultra Pure White PPU18-06
- Furniture: Shaker-style base cabinets in deep navy with crisp white uppers, brushed nickel bar pulls
- Lighting: Matte black pendant lights with exposed Edison bulbs over the island
- Materials: Satin enamel cabinet paint, oak wood grain texture, quartz waterfall countertop, brass hardware accents
I’ve watched too many homeowners rush the drying time only to find fingerprints and dust permanently embedded in their finish—give each coat a full 24 hours and your patience will pay off in a factory-smooth result that lasts years.
Design Flexibility: One Concept, Many Styles
Two-tone cabinets aren’t locked into one aesthetic. They’re chameleons that can adapt to:
- Modern minimalist kitchens
- Cozy farmhouse vibes
- Sleek contemporary spaces
- Eclectic bohemian environments
★ Steal This Look
- Paint Color: Valspar Ultra White 7006-24 for upper cabinets, Valspar Night View 5006-2 for lower cabinets
- Furniture: Streamline handleless base cabinets in matte navy, floating open shelving in natural white oak for uppers, waterfall-edge quartz island with integrated seating
- Lighting: Linear LED pendant clusters in brushed brass with dim-to-warm technology
- Materials: Matte lacquer cabinet fronts, rift-sawn white oak accents, leathered black granite countertops, unlacquered brass hardware
I’ve watched the same navy-and-white cabinet pairing feel utterly transformed just by swapping hardware—matte black pulls for moody sophistication, aged brass for warmth, or slim leather tabs for Scandinavian restraint. The cabinets stay constant; your story changes.
Common Mistakes to Avoid
❌ Don’t:
- Choose colors that clash
- Ignore your kitchen’s existing color palette
- Skip proper preparation
- Use cheap paint
✅ Do:
- Test color samples first
- Consider natural lighting
- Invest in quality materials
- Think about long-term appeal
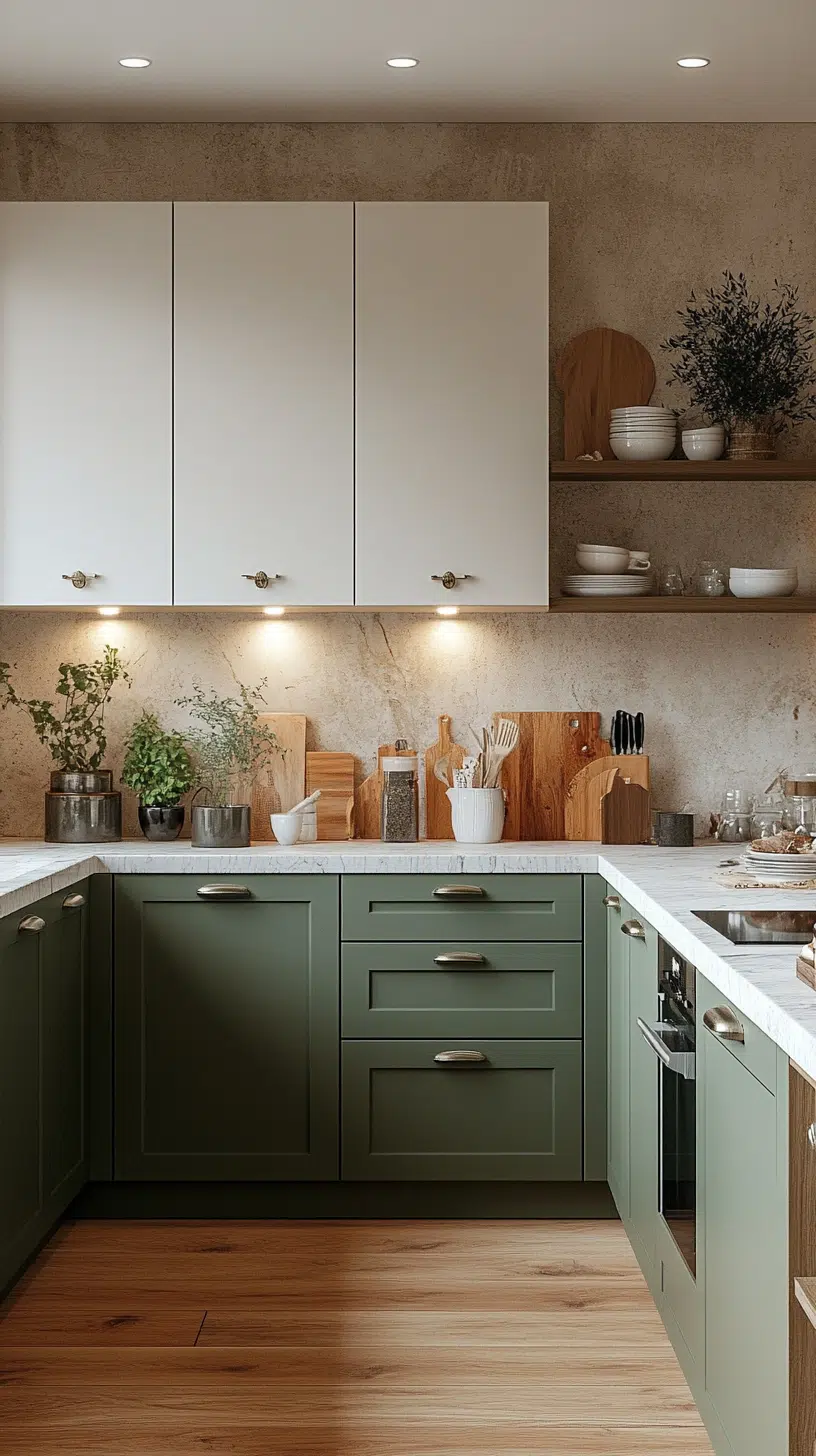
🖼 Steal This Look
- Paint Color: PPG Delicate White PPG1001-1
- Furniture: Shaker-style base cabinets in deep navy (PPG Hale Navy PPG1153-7) with warm white upper cabinets, brushed brass bar pulls, and Carrara marble-look quartz countertops
- Lighting: Matte black pendant lights with clear glass shades over the island, paired with recessed LED downlights
- Materials: Hardwood or luxury vinyl plank flooring in warm oak tones, subway tile backsplash in soft gray, and satin brass hardware throughout
I’ve seen too many homeowners rush into trendy color pairings that fight their fixed elements—your granite countertops and flooring aren’t going anywhere, so let them guide your two-tone palette rather than forcing a Pinterest favorite that doesn’t belong.
Maintenance & Longevity
Keeping Your Two-Tone Cabinets Stunning:
- Regular gentle cleaning
- Touch up paint annually
- Replace hardware to refresh look
- Use cabinet liners to protect surfaces
🖼 Steal This Look
- Paint Color: Dunn-Edwards Whisper DEW340 for upper cabinets, Dunn-Edwards Black DEA187 for lower cabinets
- Furniture: Shaker-style base cabinets in deep navy or charcoal, simple slab uppers in warm white or soft gray
- Lighting: Brushed brass or matte black under-cabinet LED strips paired with clear glass globe pendants over island
- Materials: Painted hardwood or MDF cabinet boxes, satin brass pulls and knobs, quartz or butcher block countertops, natural fiber cabinet liners
I learned this the hard way after my own two-tone kitchen started looking tired at the two-year mark—now I do a gentle deep clean quarterly and touch up the lower cabinet scuffs every spring; it takes an hour and keeps everything looking freshly installed.
Your Next Steps
- Measure your kitchen
- Collect paint swatches
- Experiment with digital design tools
- Consider professional consultation if needed
Ballpark Budget & Timeline
- Weekend Warrior DIY: 2-3 days
- Professional Refresh: 1 week
- Full Renovation: 4-6 weeks
★ Steal This Look
- Paint Color: Clare Paint Whipped CODE
- Furniture: Shaker-style base cabinets in deep navy with crisp white uppers, brushed brass bar pulls, quartz waterfall island countertop
- Lighting: Matte black linear pendant lights with gold interior over island, recessed can lights with warm dim
- Materials: Paint-grade MDF for smooth finish, natural oak open shelving, handmade zellige tile backsplash, leathered granite perimeter counters
I always tell clients to start with their lower cabinet color first—it’s the anchor that grounds the kitchen, then let the uppers breathe with something lighter. There’s something deeply satisfying about opening a navy lower cabinet and seeing that rich color hidden inside.
Final Thoughts
Two-tone kitchen cabinets aren’t just a design choice—they’re a statement. They say you’re bold, you understand design, and you’re not afraid to make your space uniquely yours.
Pro Tip: Confidence is the best accessory in any kitchen redesign. Own your choices.