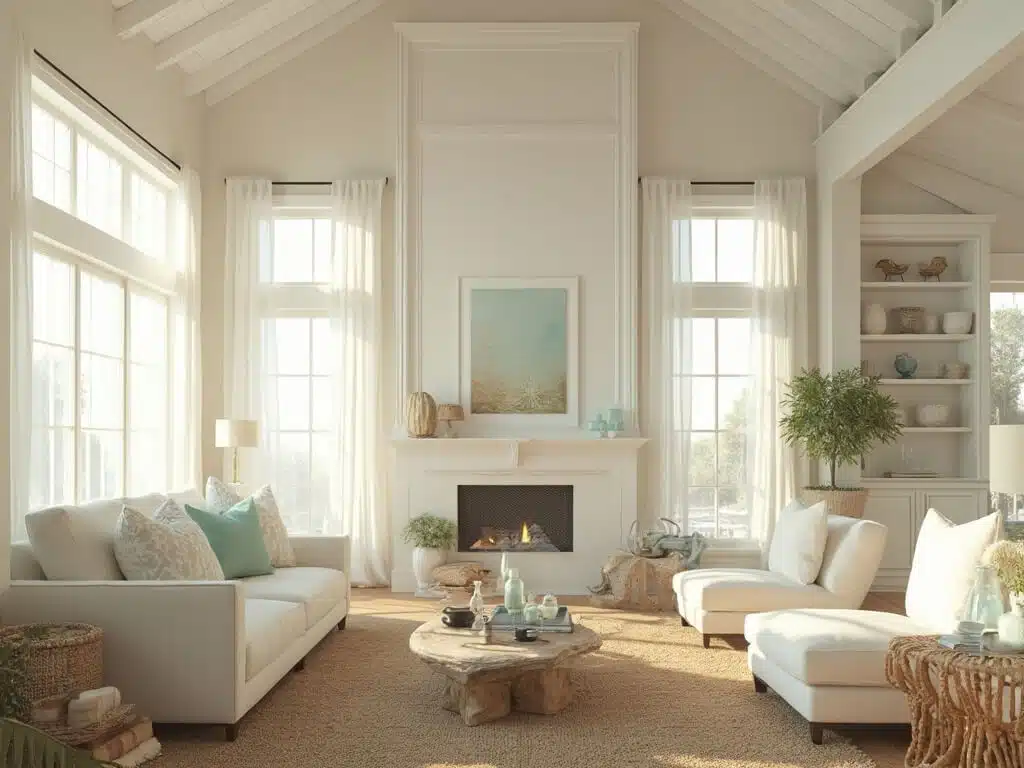
Rustic Wedding Centerpieces That’ll Make Your Guests Actually Put Down Their Phones
Rustic wedding centerpieces are honestly the best thing that ever happened to couples who want their wedding to feel warm and inviting without dropping a car payment on flowers.
I’ll never forget walking into my cousin Sarah’s barn wedding three years ago and literally gasping at her tables. She’d spent maybe $40 per table (I grilled her about the budget later), but it looked like something straight out of a Pinterest dream board. The secret? She embraced the whole rustic vibe instead of fighting it, and honestly, it worked better than half the fancy hotel weddings I’ve been to.
🌟 Steal This Look
- Paint Color: Sherwin-Williams Alabaster SW 7008
- Furniture: Long wooden farm tables with mismatched vintage wooden chairs, rough-hewn wooden cross-back chairs, or simple wooden benches
- Lighting: Warm Edison bulb string lights draped overhead, mason jar pendant lights, or wrought iron candelabras with taper candles
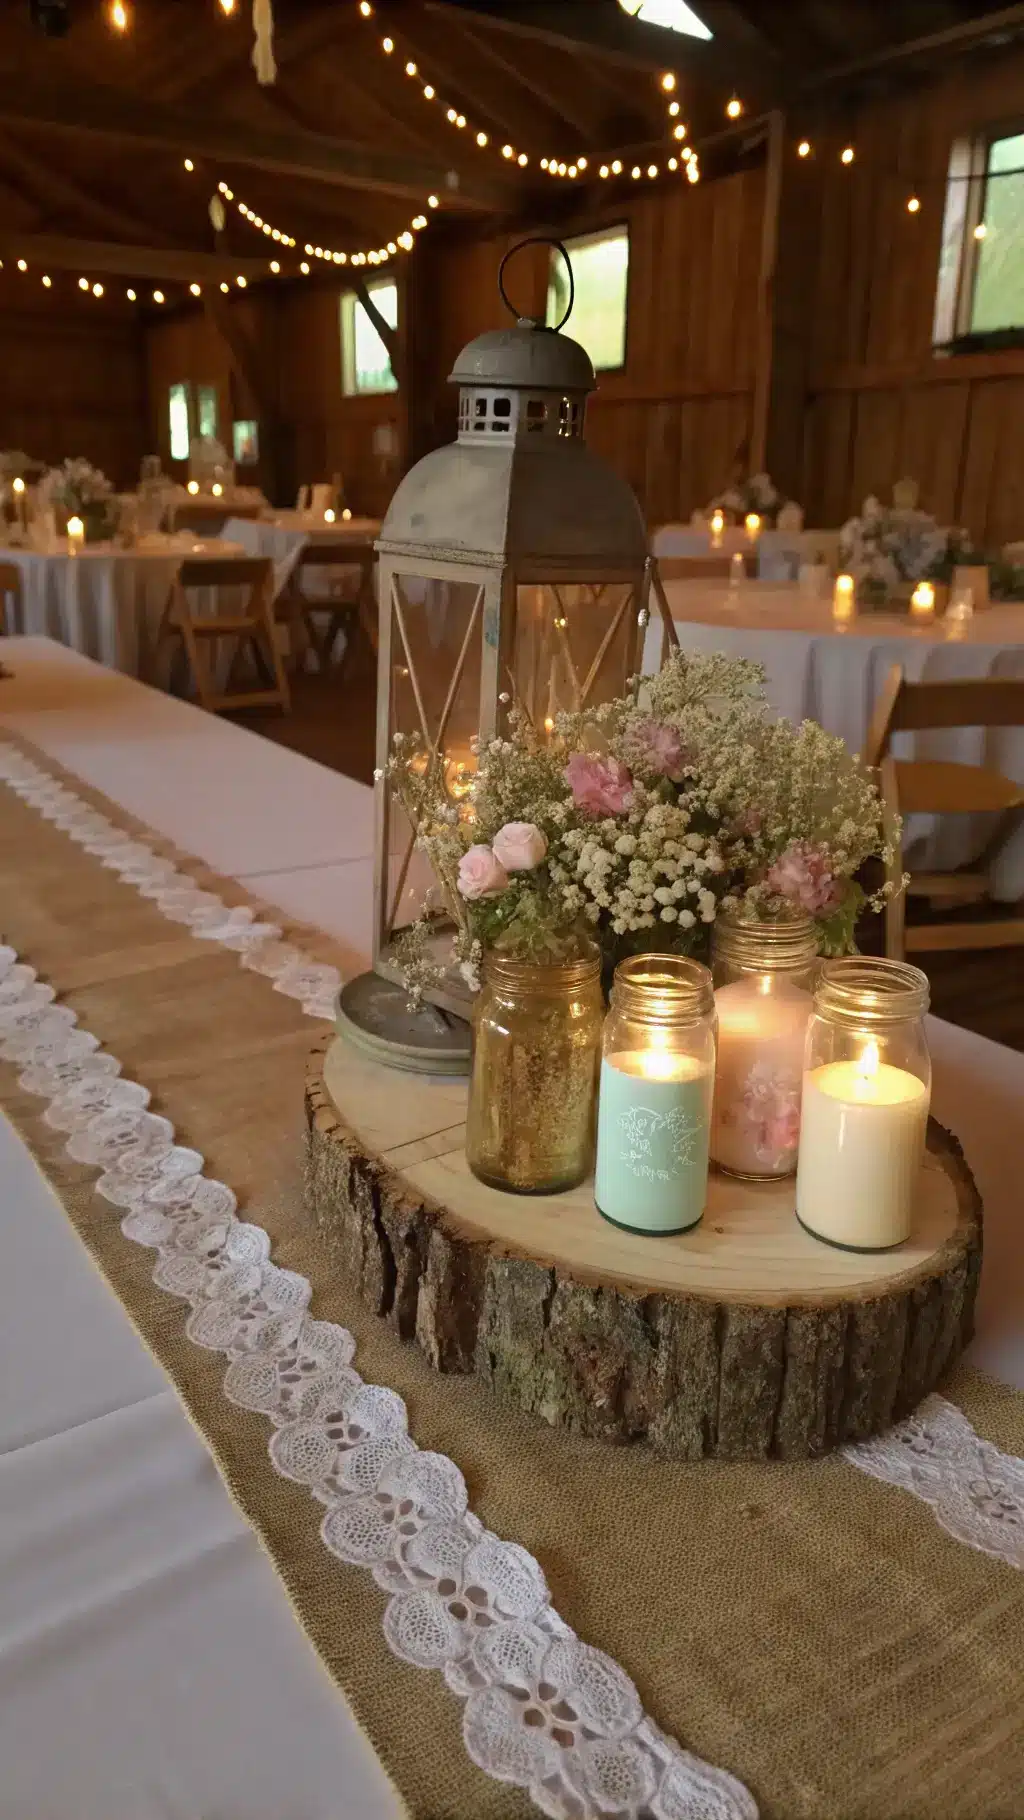
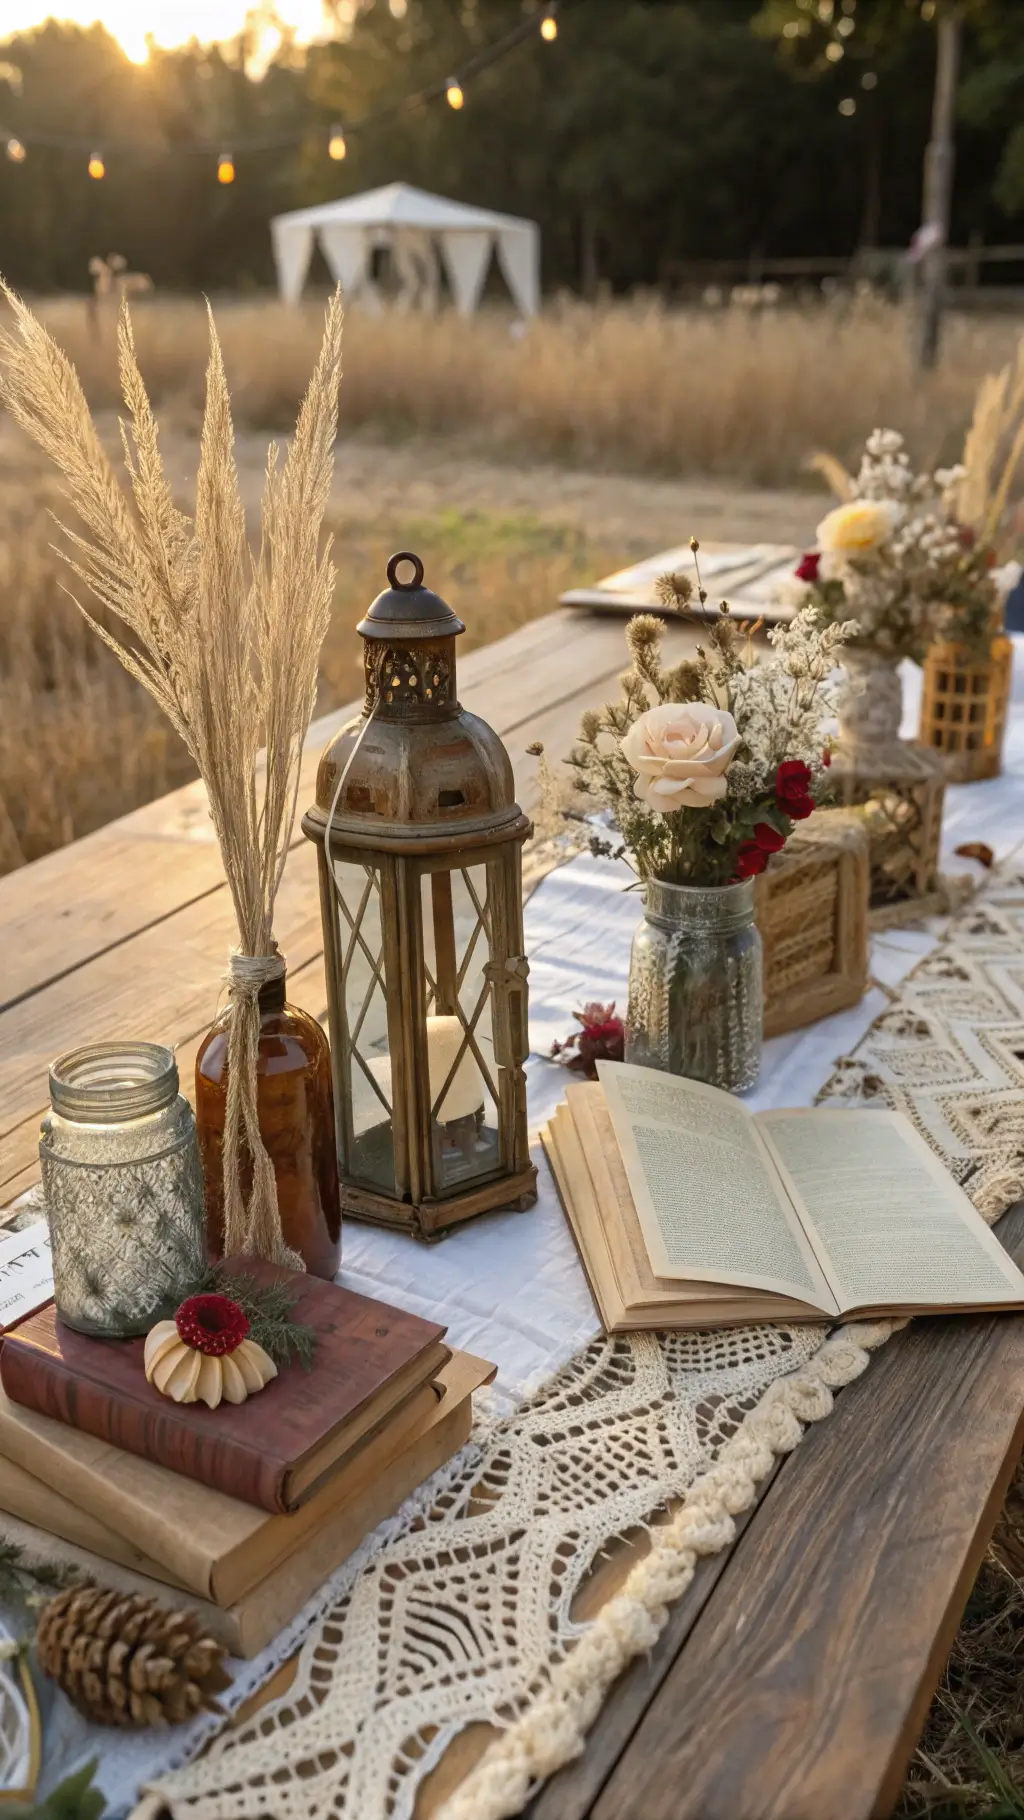
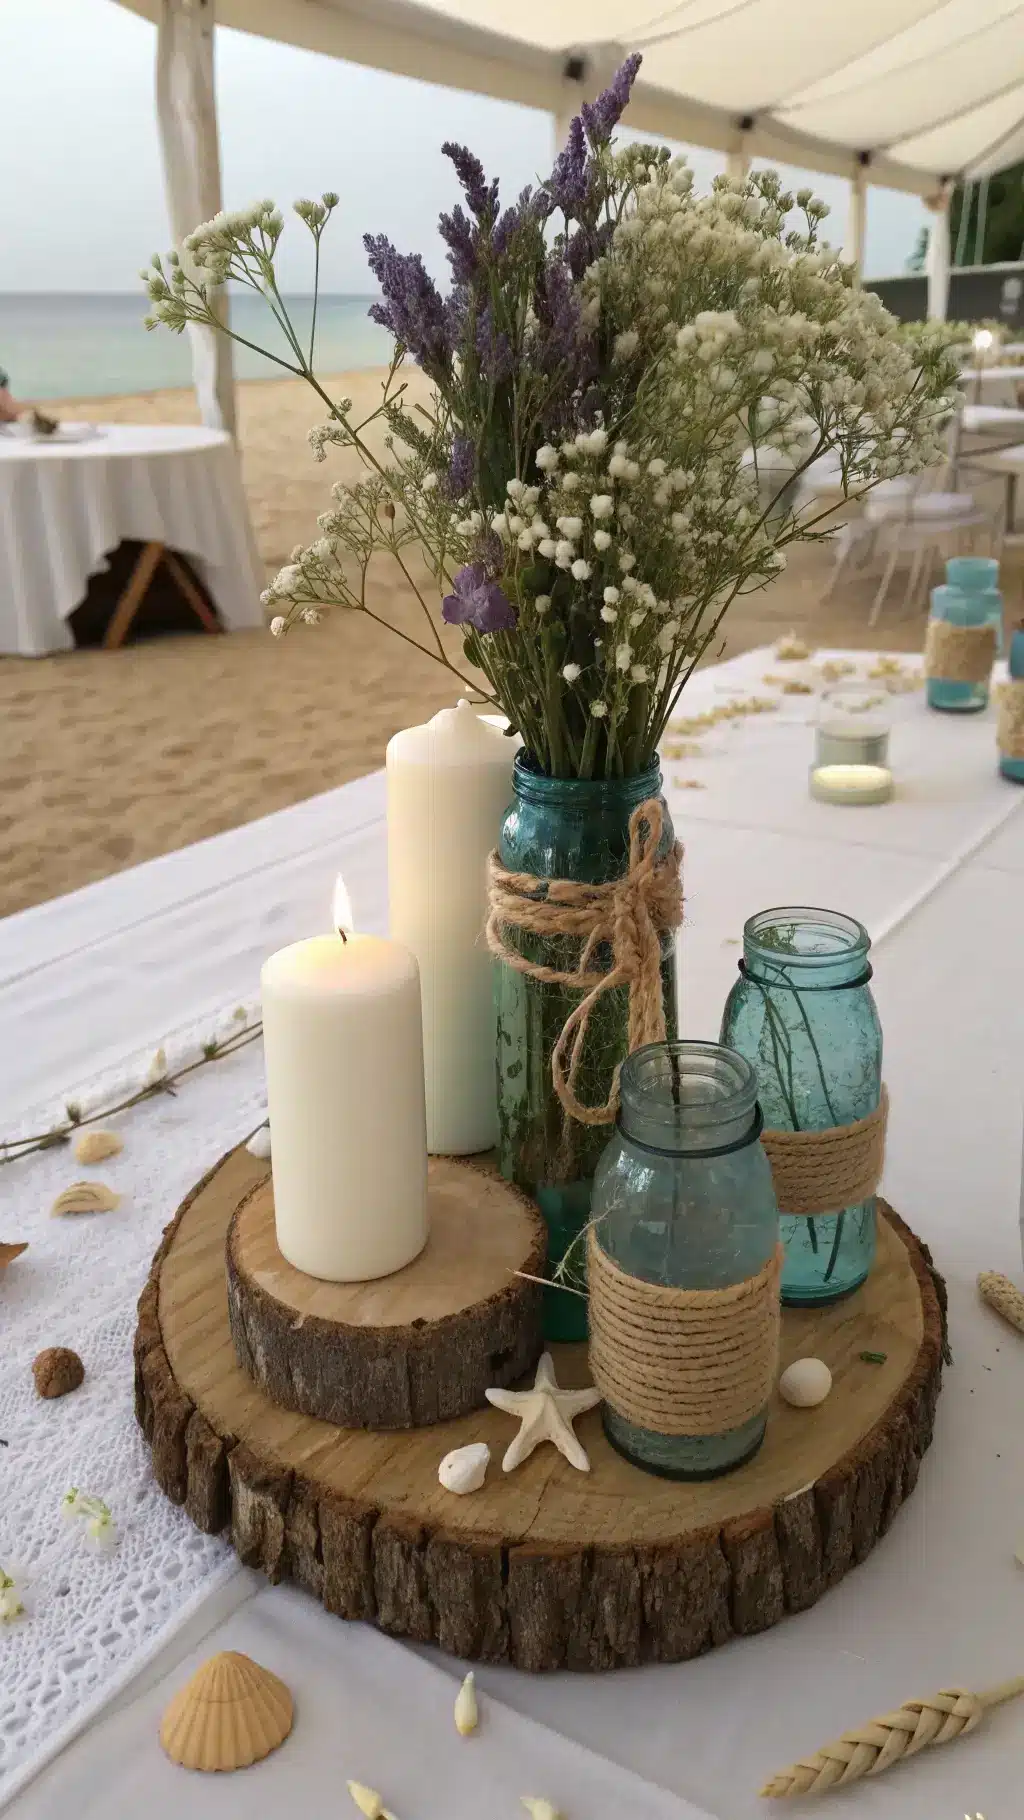
- Materials: Weathered barn wood, galvanized metal buckets, burlap runners, twine, wildflowers, eucalyptus, baby’s breath, river rocks, and vintage glass bottles
There’s something deeply satisfying about centerpieces that look like you gathered them from a meadow that morning—even if you spent three weeks sourcing the perfect dried wheat stalks.
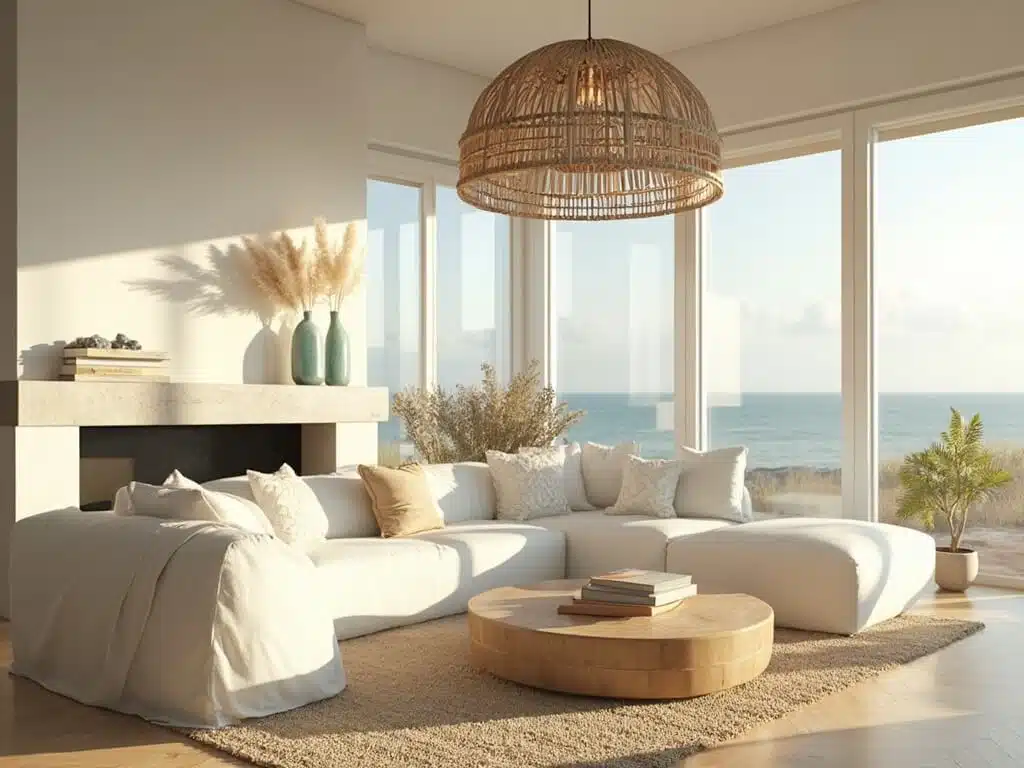
Why Rustic Centerpieces Are Actually Genius
Look, I’m gonna be real with you. Traditional wedding centerpieces can run you $150+ per table for arrangements that your guests will barely notice between the salad course and speeches.
Rustic wedding centerpieces flip that whole expensive script.
Here’s what makes them ridiculously practical:
- Budget-friendly: $10-$75 per table (yes, really)
- DIY-able: Even if you’ve never arranged flowers in your life
- Flexible: Works for 20 guests or 200
- Reusable: Keep the wooden slices and Mason jars for your home afterward
- Forgiving: Imperfections actually add to the charm
I’ve helped style four weddings in the last two years, and the rustic ones always get the most compliments. There’s something about natural materials that just feels right at a celebration.
🏠 Steal This Look
- Paint Color: Benjamin Moore White Dove OC-17
- Furniture: Farmhouse trestle tables, cross-back wooden chairs, vintage wooden barrels for cocktail hour
- Lighting: Edison bulb string lights with black metal cages, mason jar pendant clusters
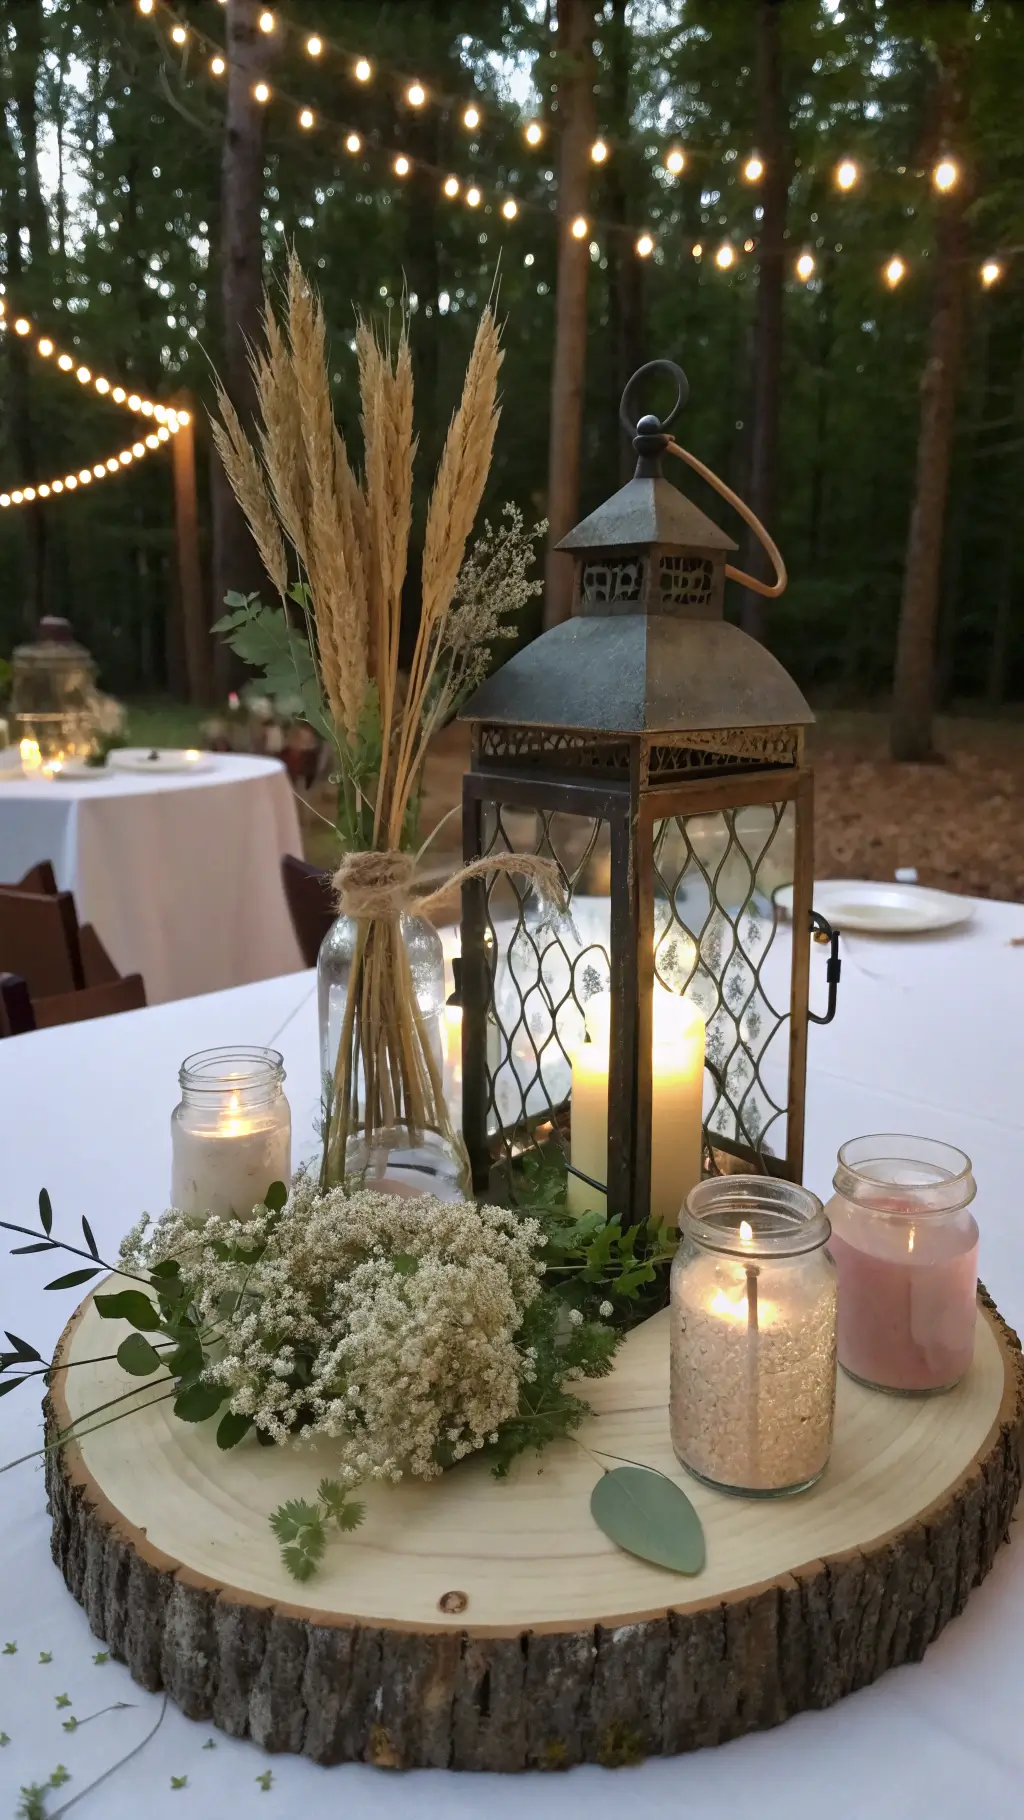
- Materials: Raw-edge wood slices, burlap runners, galvanized metal buckets, twine, dried wheat and eucalyptus, unscented pillar candles
There’s something quietly rebellious about choosing mason jars over crystal vases—it signals to your guests that the night is about genuine connection, not performance. I’ve watched nervous couples relax the moment they stop trying to impress and start creating something that actually feels like them.
What You Actually Need (No Fancy Florist Required)
The Non-Negotiable Hero Pieces
These three items form the backbone of literally every stunning rustic centerpiece I’ve ever seen:
Mason jars – The MVP of rustic decor. I know they’re everywhere, but there’s a reason for that. They’re cheap, versatile, and they look good with everything from wildflowers to fairy lights. Buy them in bulk and save yourself like 60% compared to craft stores.
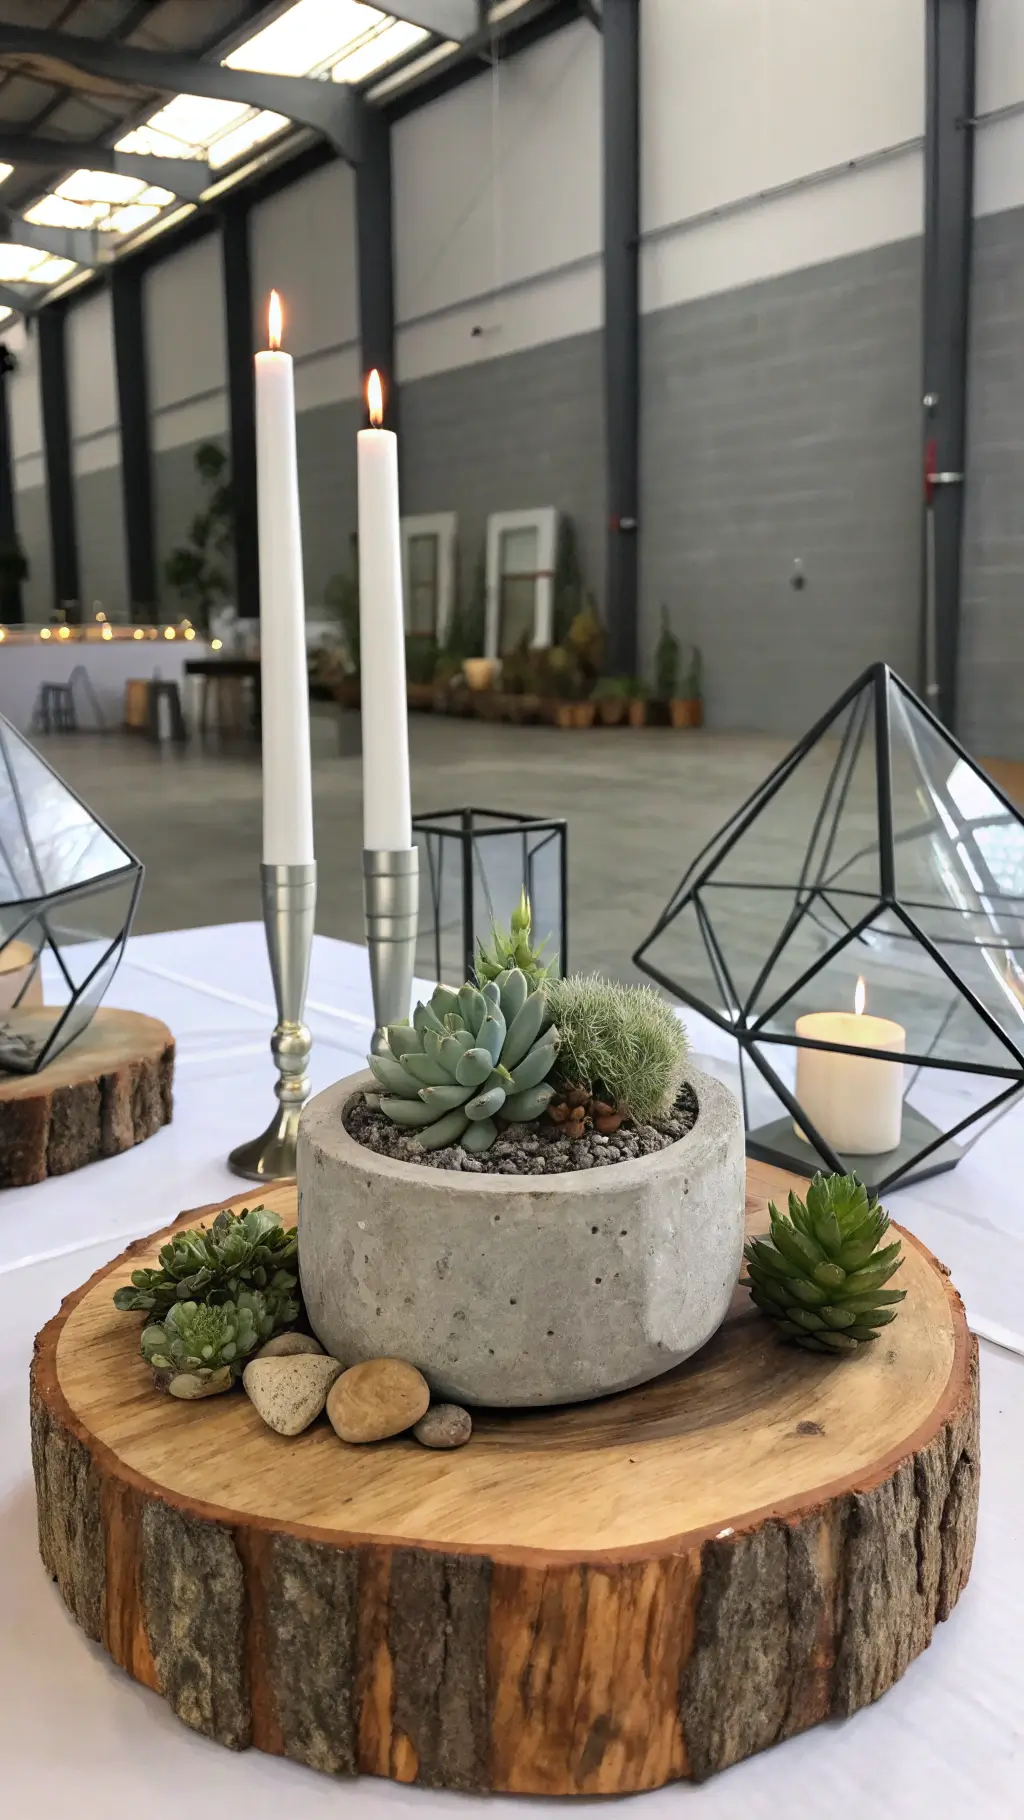
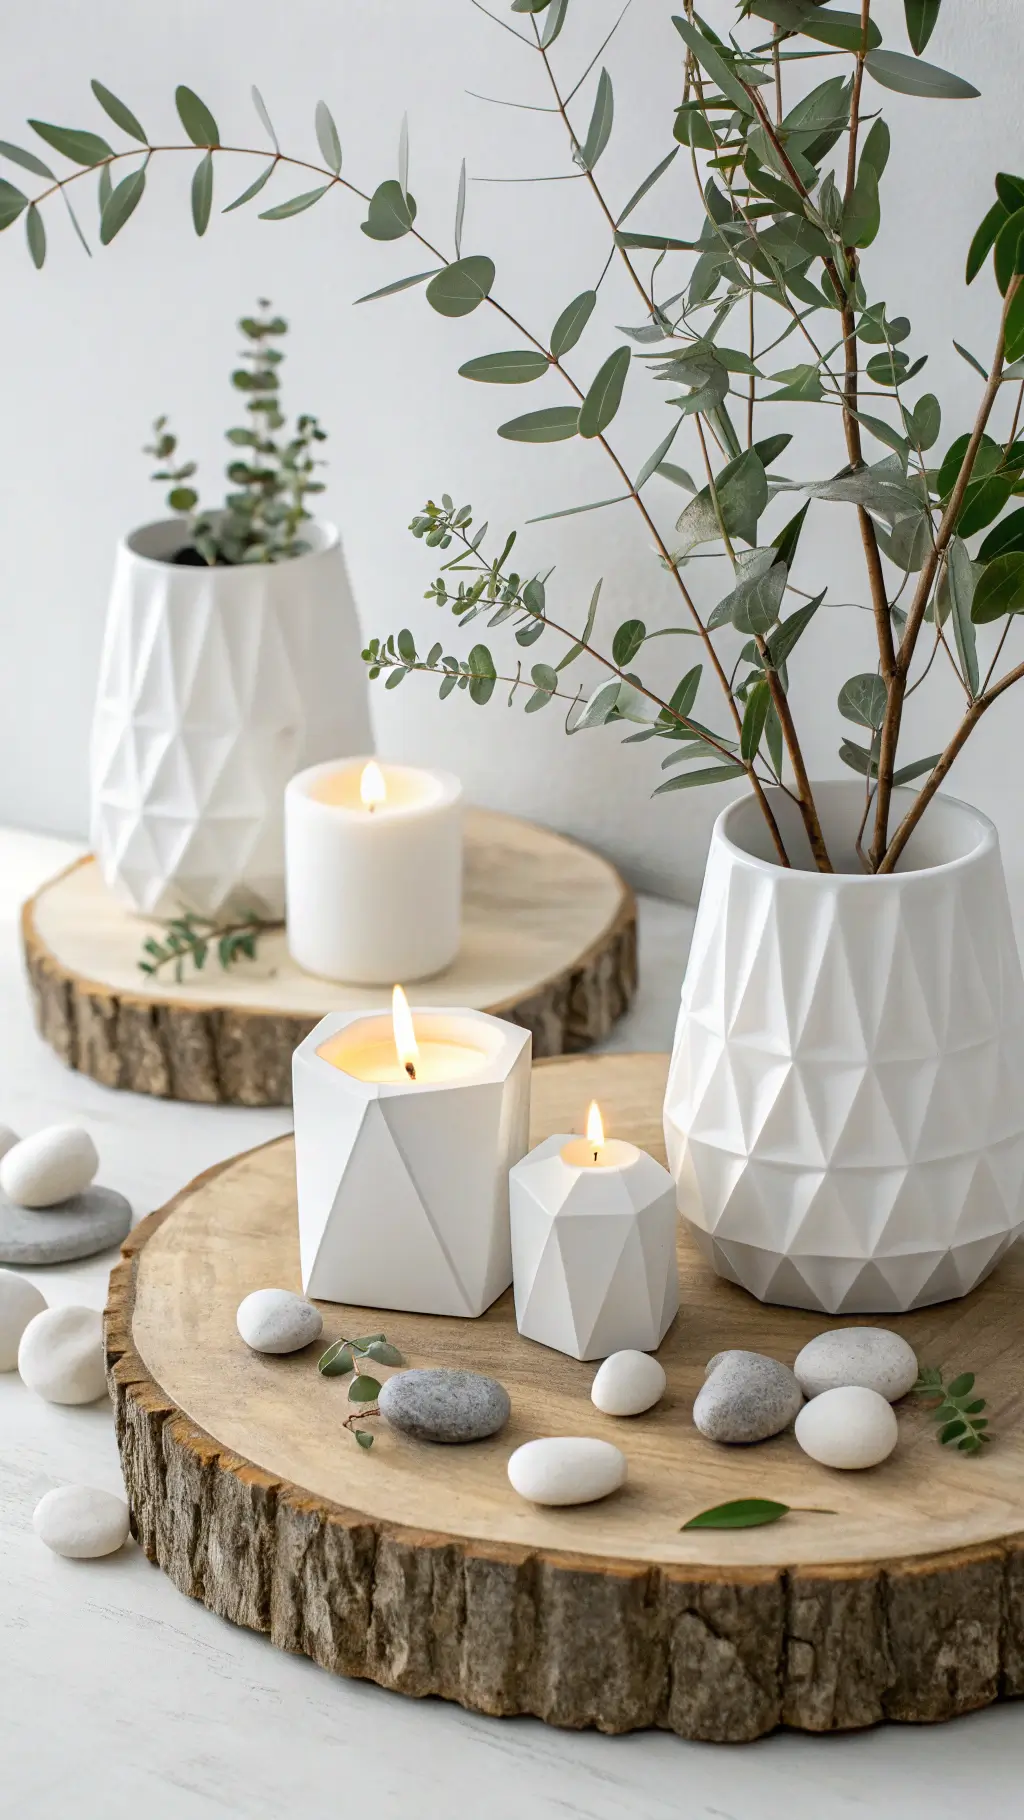
Wood slices – Your foundation element. These create instant rustic vibes and give you a stable base for everything else. Pro tip: My neighbor literally cut these from fallen trees in his yard and sanded them down. Free is good.
Rustic lanterns or hurricane candle holders – The mood setters. Candlelight makes everyone look better and feel more relaxed. This isn’t optional if you want that warm, inviting glow in your photos.
The Supporting Cast That Makes It Pop
Once you’ve got your heroes, add these complementary pieces:
- Wildflowers or greenery bunches
- Burlap table runners
- Twine and lace ribbon
- Votive candles
The Secret Weapons (Optional But Awesome)
Want to take things up a notch? These additions are chef’s kiss:
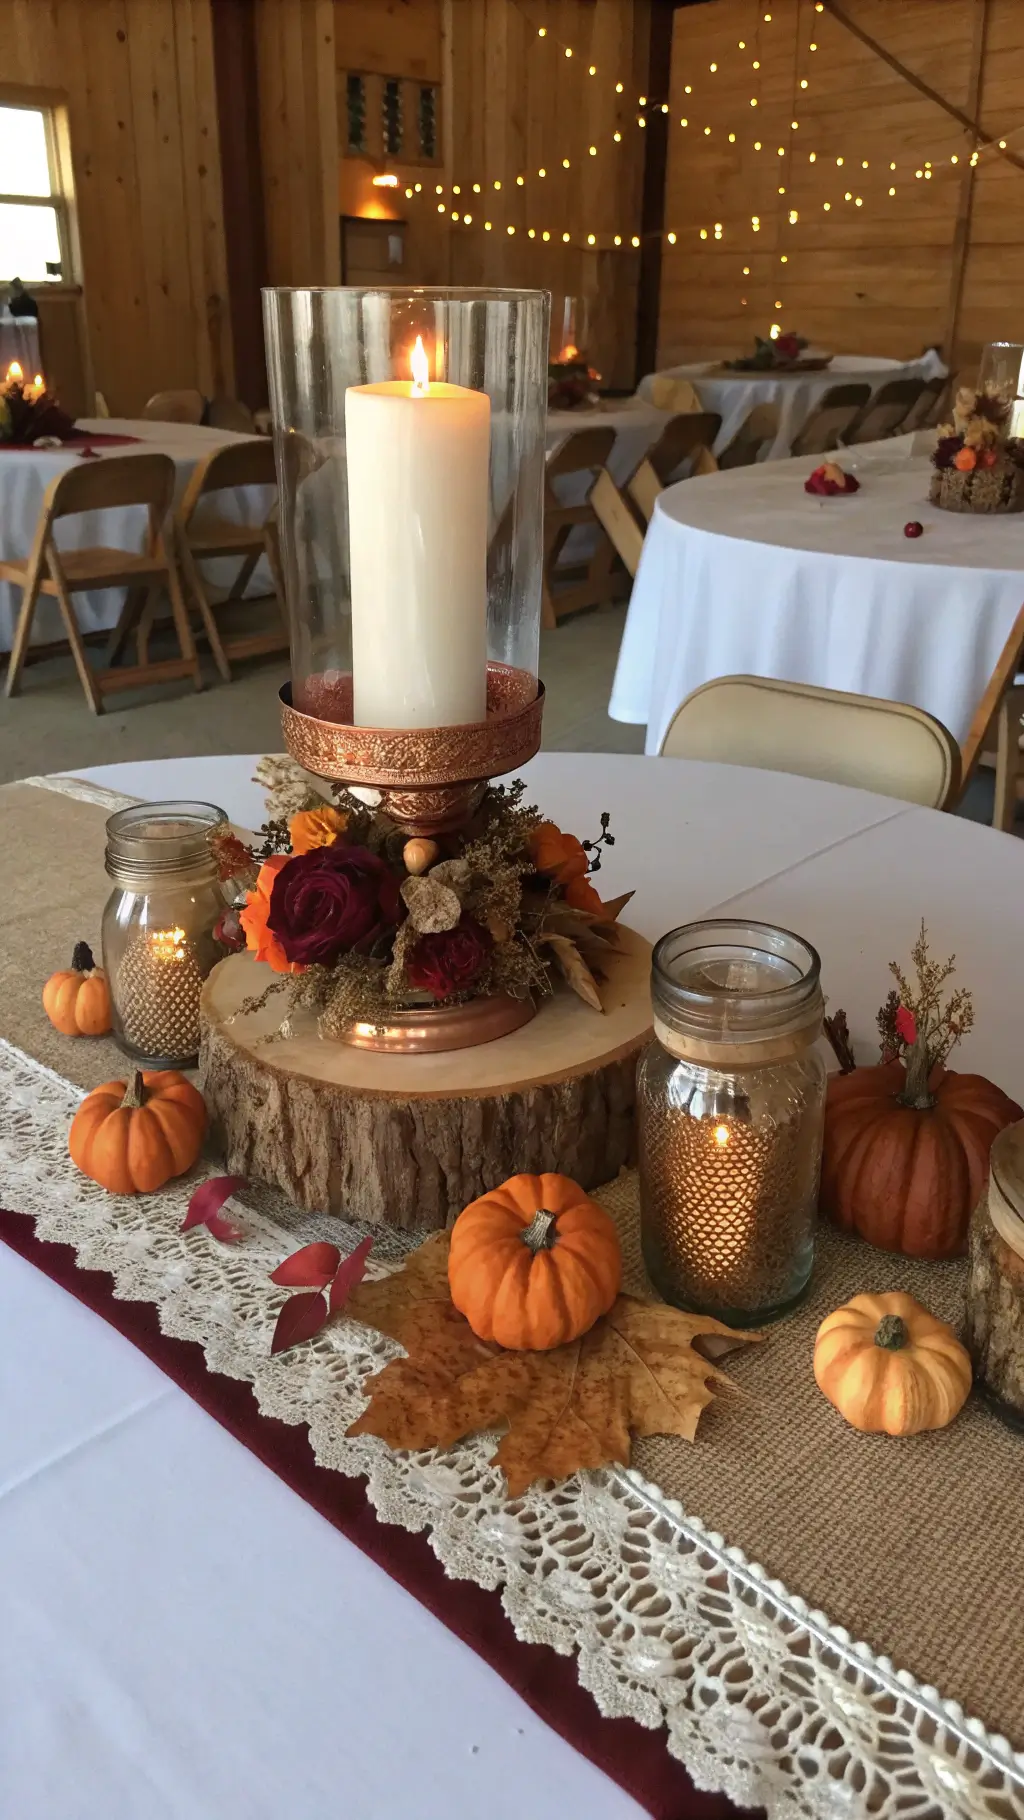
- Seasonal stuff: Mini pumpkins for fall, pinecones for winter, fresh fruit for summer
- Potted succulents or herbs
- Fairy lights
- Mercury glass votives
🖼 Steal This Look
- Paint Color: Farrow & Ball Mouse’s Back 40
- Furniture: long wooden farm tables with mismatched vintage wooden chairs
- Lighting: warm Edison bulb string lights draped overhead and votive candles scattered down tables
- Materials: unfinished wood, clear glass mason jars, galvanized metal, burlap ribbon, twine, wild greenery, dried wheat stalks
There’s something deeply satisfying about building your own centerpieces from found and humble materials—every time I see mason jars catching candlelight across a farm table, I’m reminded that the best weddings feel handmade, not purchased.
Actually Putting It All Together (The Fun Part)
Step One: Prep Your Space
Clear everything off the tables and wipe them down. Lay your burlap runner or place your wood slices where you want them. Step back and make sure the base layer looks balanced before you start piling stuff on.
Step Two: Start With Your Anchor
This is the biggest or tallest thing on your table. For me, it’s usually a lantern or a taller vase with branches. Place this slightly off-center—dead center looks too formal and stuffy for rustic vibes.
Step Three: Build Around It
Now comes the fun part where it starts looking like an actual centerpiece.
The layering trick that changed everything for me:
- Add your medium-height elements next (Mason jars with flowers, smaller candle holders)
- Tuck in your low elements (votives, scattered greenery, small accents)
- Fill gaps with texture (moss, twine-wrapped items, burlap flowers)
Pro tip: Vary the heights so guests can see across the table. Nothing kills conversation faster than a wall of flowers blocking eye contact.
Step Four: Add Your Finishing Touches
Walk around the table and look from different angles. Tuck in a few more sprigs of greenery, adjust your candles so they’re at different levels, maybe add one more vintage glass bottle if something feels off.
🎨 Steal This Look
- Paint Color: Behr Weathered Moss N350-3
- Furniture: Long farm tables with natural wood grain, cross-back wooden chairs, vintage wooden barrels as accent tables
- Lighting: Edison bulb string lights draped overhead, galvanized metal lanterns with flickering LED candles, mason jar pendant lights
- Materials: Burlap table runners, unfinished wood slices, galvanized metal, weathered barn wood, jute twine, dried wheat and eucalyptus
There’s something deeply satisfying about that moment when scattered elements suddenly click into a cohesive scene—like the table itself exhales and feels lived-in rather than decorated.
The Color Game (Don’t Overthink This)
Your safe zone:
- Earthy neutrals (browns, creams, tans)
- Dusty greens
- Muted pastels (blush pink, soft lavender)
- Rich autumn shades (burnt orange, deep red)
One pop of brighter color can actually elevate the whole look.
🏠 Steal This Look
- Paint Color: Valspar Homestead Resort Parlor Beige 3009-10C
- Furniture: Weathered farm tables with mismatched wooden chairs, vintage wooden crates as risers for centerpiece height variation
- Lighting: Warm Edison bulb string lights draped overhead with brass candlestick holders for table glow
- Materials: Burlap table runners, raw linen napkins, weathered wood slices, terracotta pots, dried wheat and pampas grass, amber glass bottles
I’ve seen couples panic over color wheels when their grandmother’s cream lace tablecloth and a handful of foraged greenery told the whole story—rustic weddings reward restraint, not rainbow chasing.
Common Mistakes I’ve Seen (And Made)
Mistake #1: Everything’s the Same Height
Mix tall pillar candles, medium vases, and low votives for visual interest.
Mistake #2: Too Much Stuff
Leave some breathing room—negative space is your friend.
Mistake #3: Forgetting About Repetition
Each table should feel unique, but they need something tying them together.
Mistake #4: Ignoring the Lighting
Test your centerpieces in the actual lighting you’ll have at your reception.